
Note to my readers: If you find this write-up helpful, all I ask in return is that you visit my homepage and browse some of the pages on my website! Positive traffic on my website helps my business. Thank you!
Fort Collins Wedding Photographer
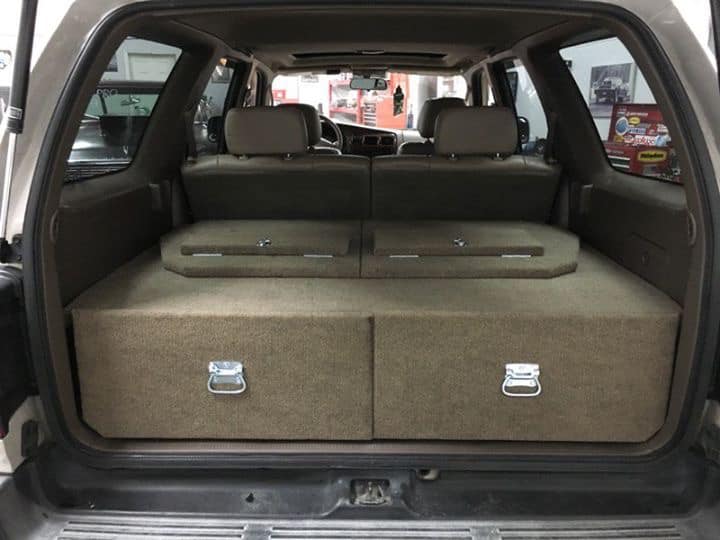
New Build (version 2)
New Build (version 2)
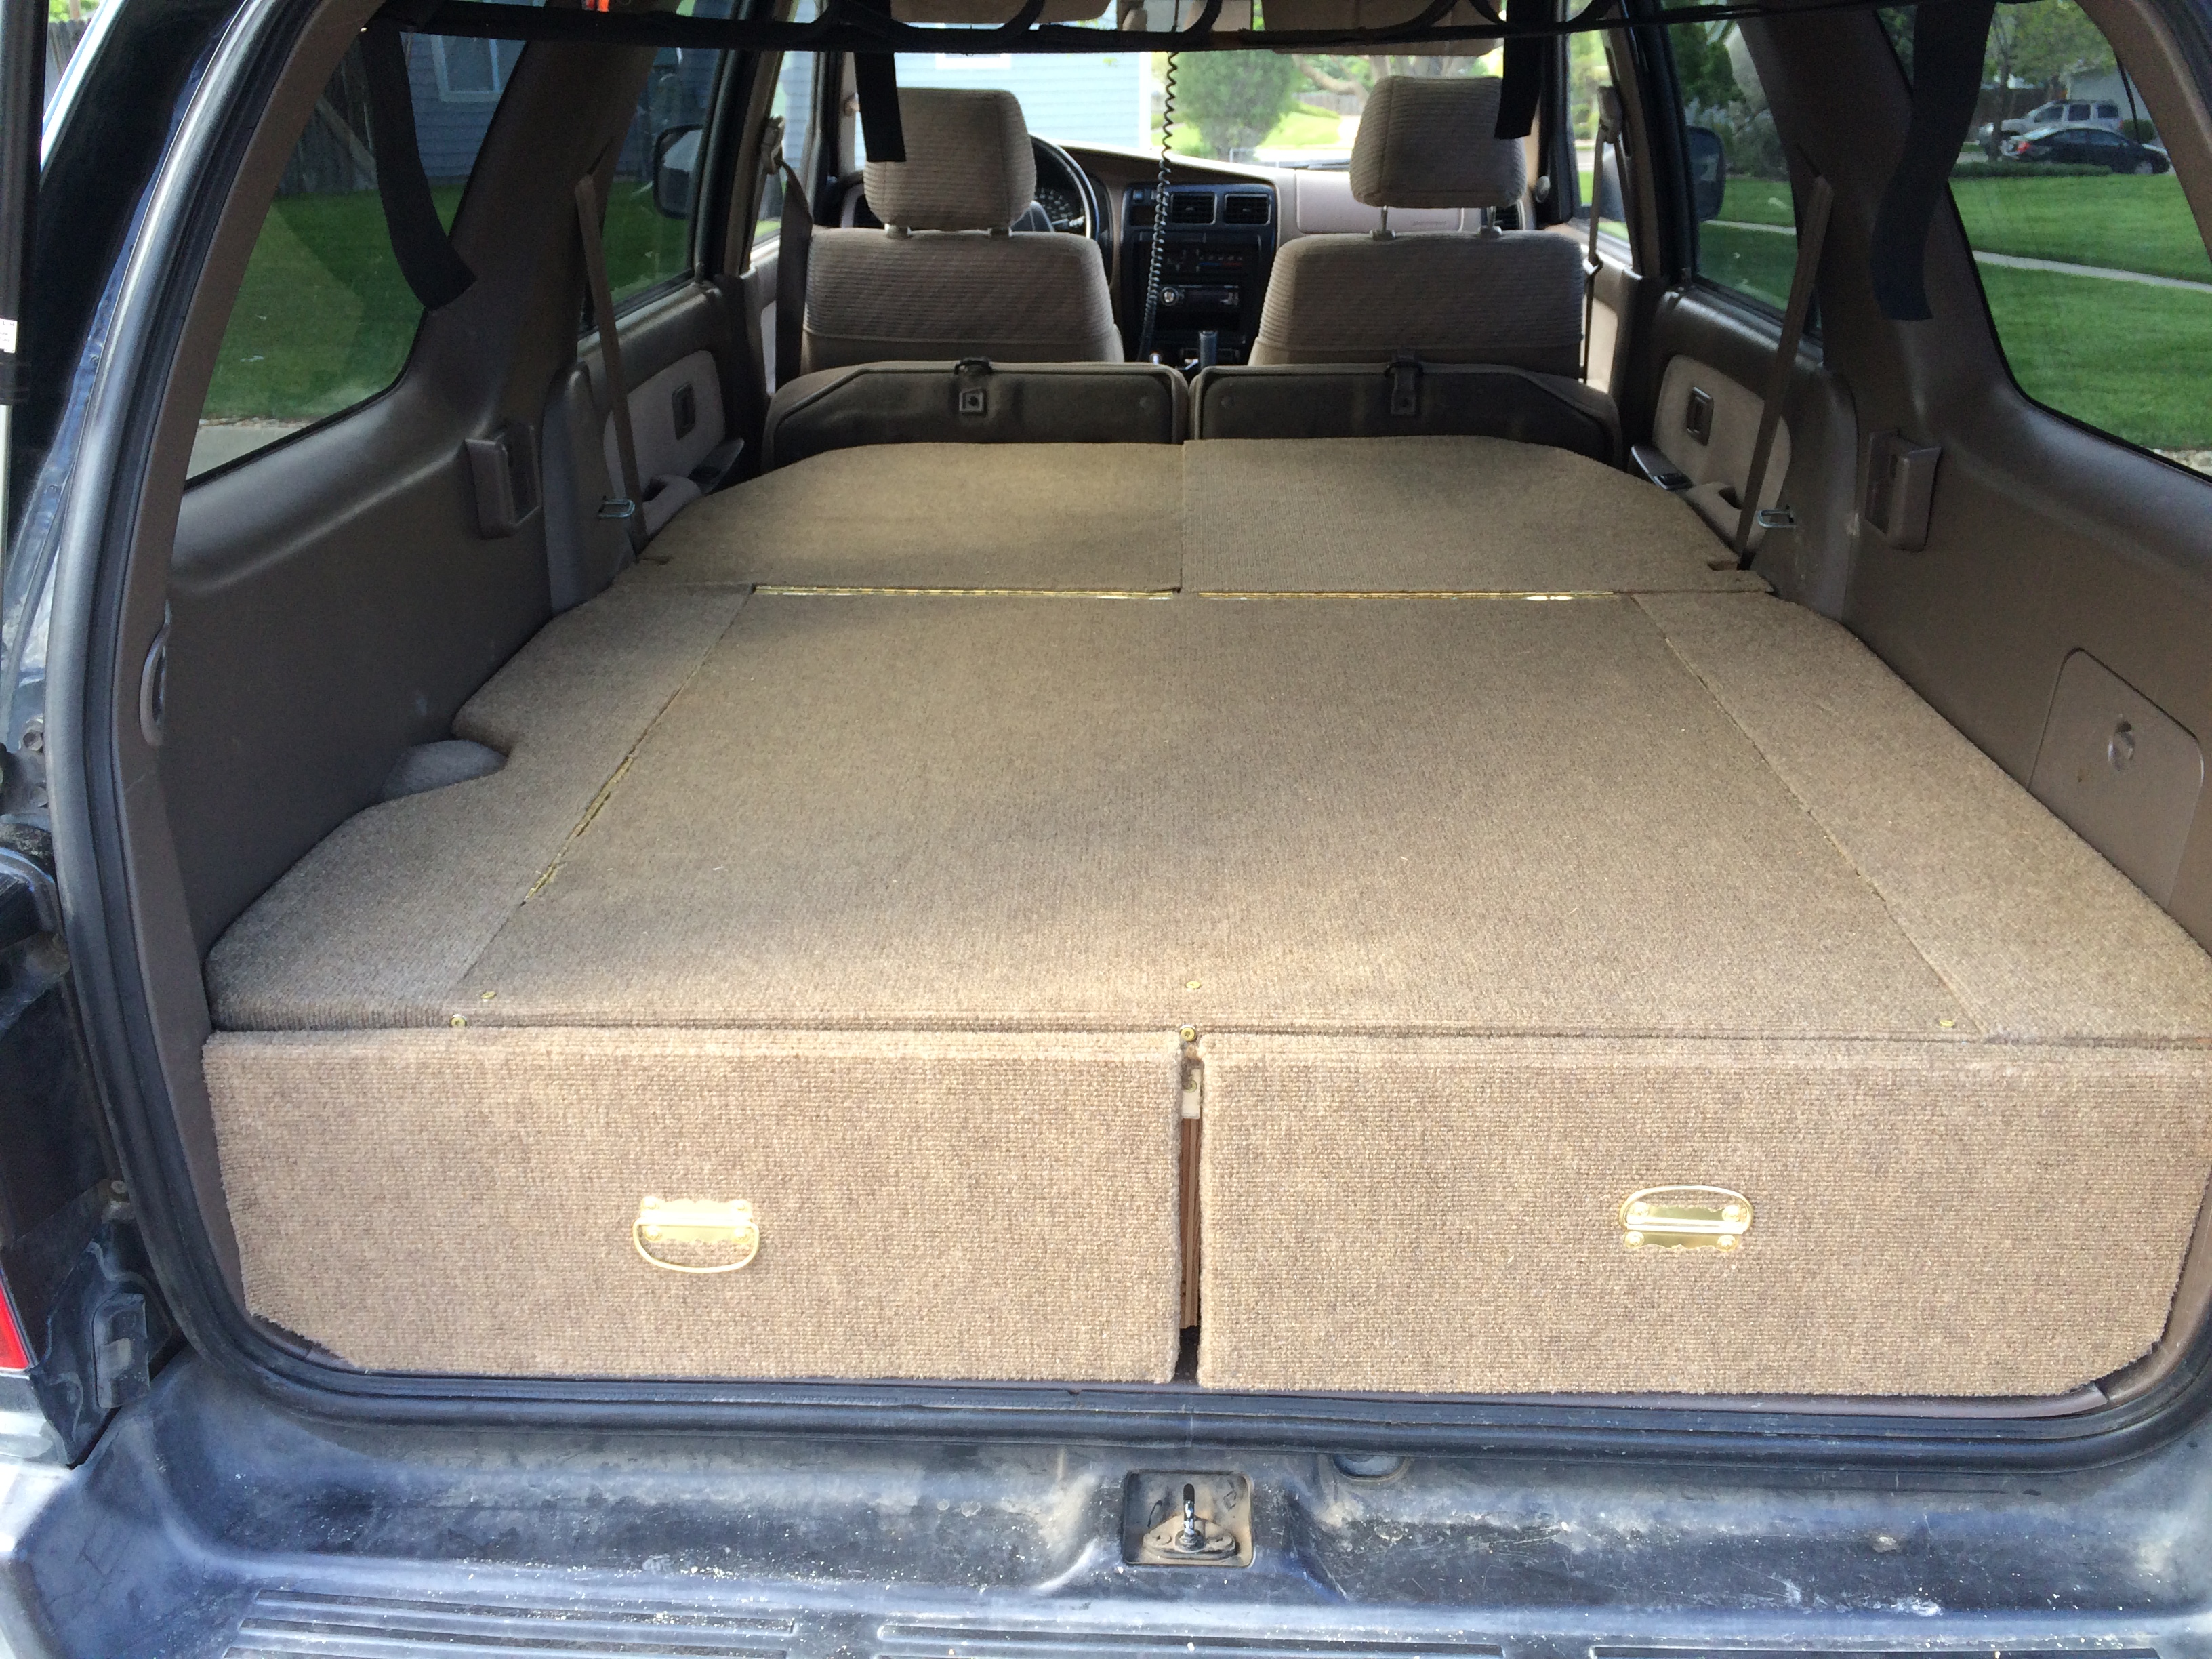
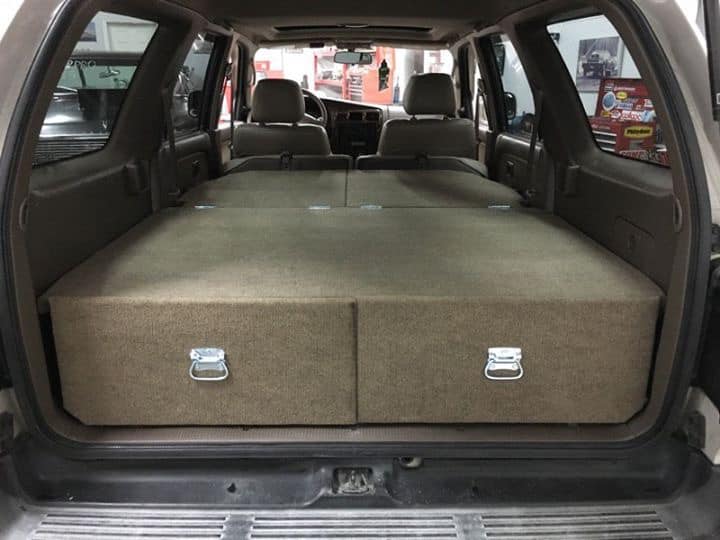
Original Build (version 1)
HOW TO BUILD A 4RUNNER SLEEPING PLATFORM
NEW PLATFORM BUILD AND SPECIFICATIONS (VERSION 2): COMING SOON
ORIGINAL PLATFORM BUILD AND SPECIFICATIONS (VERSION 1):
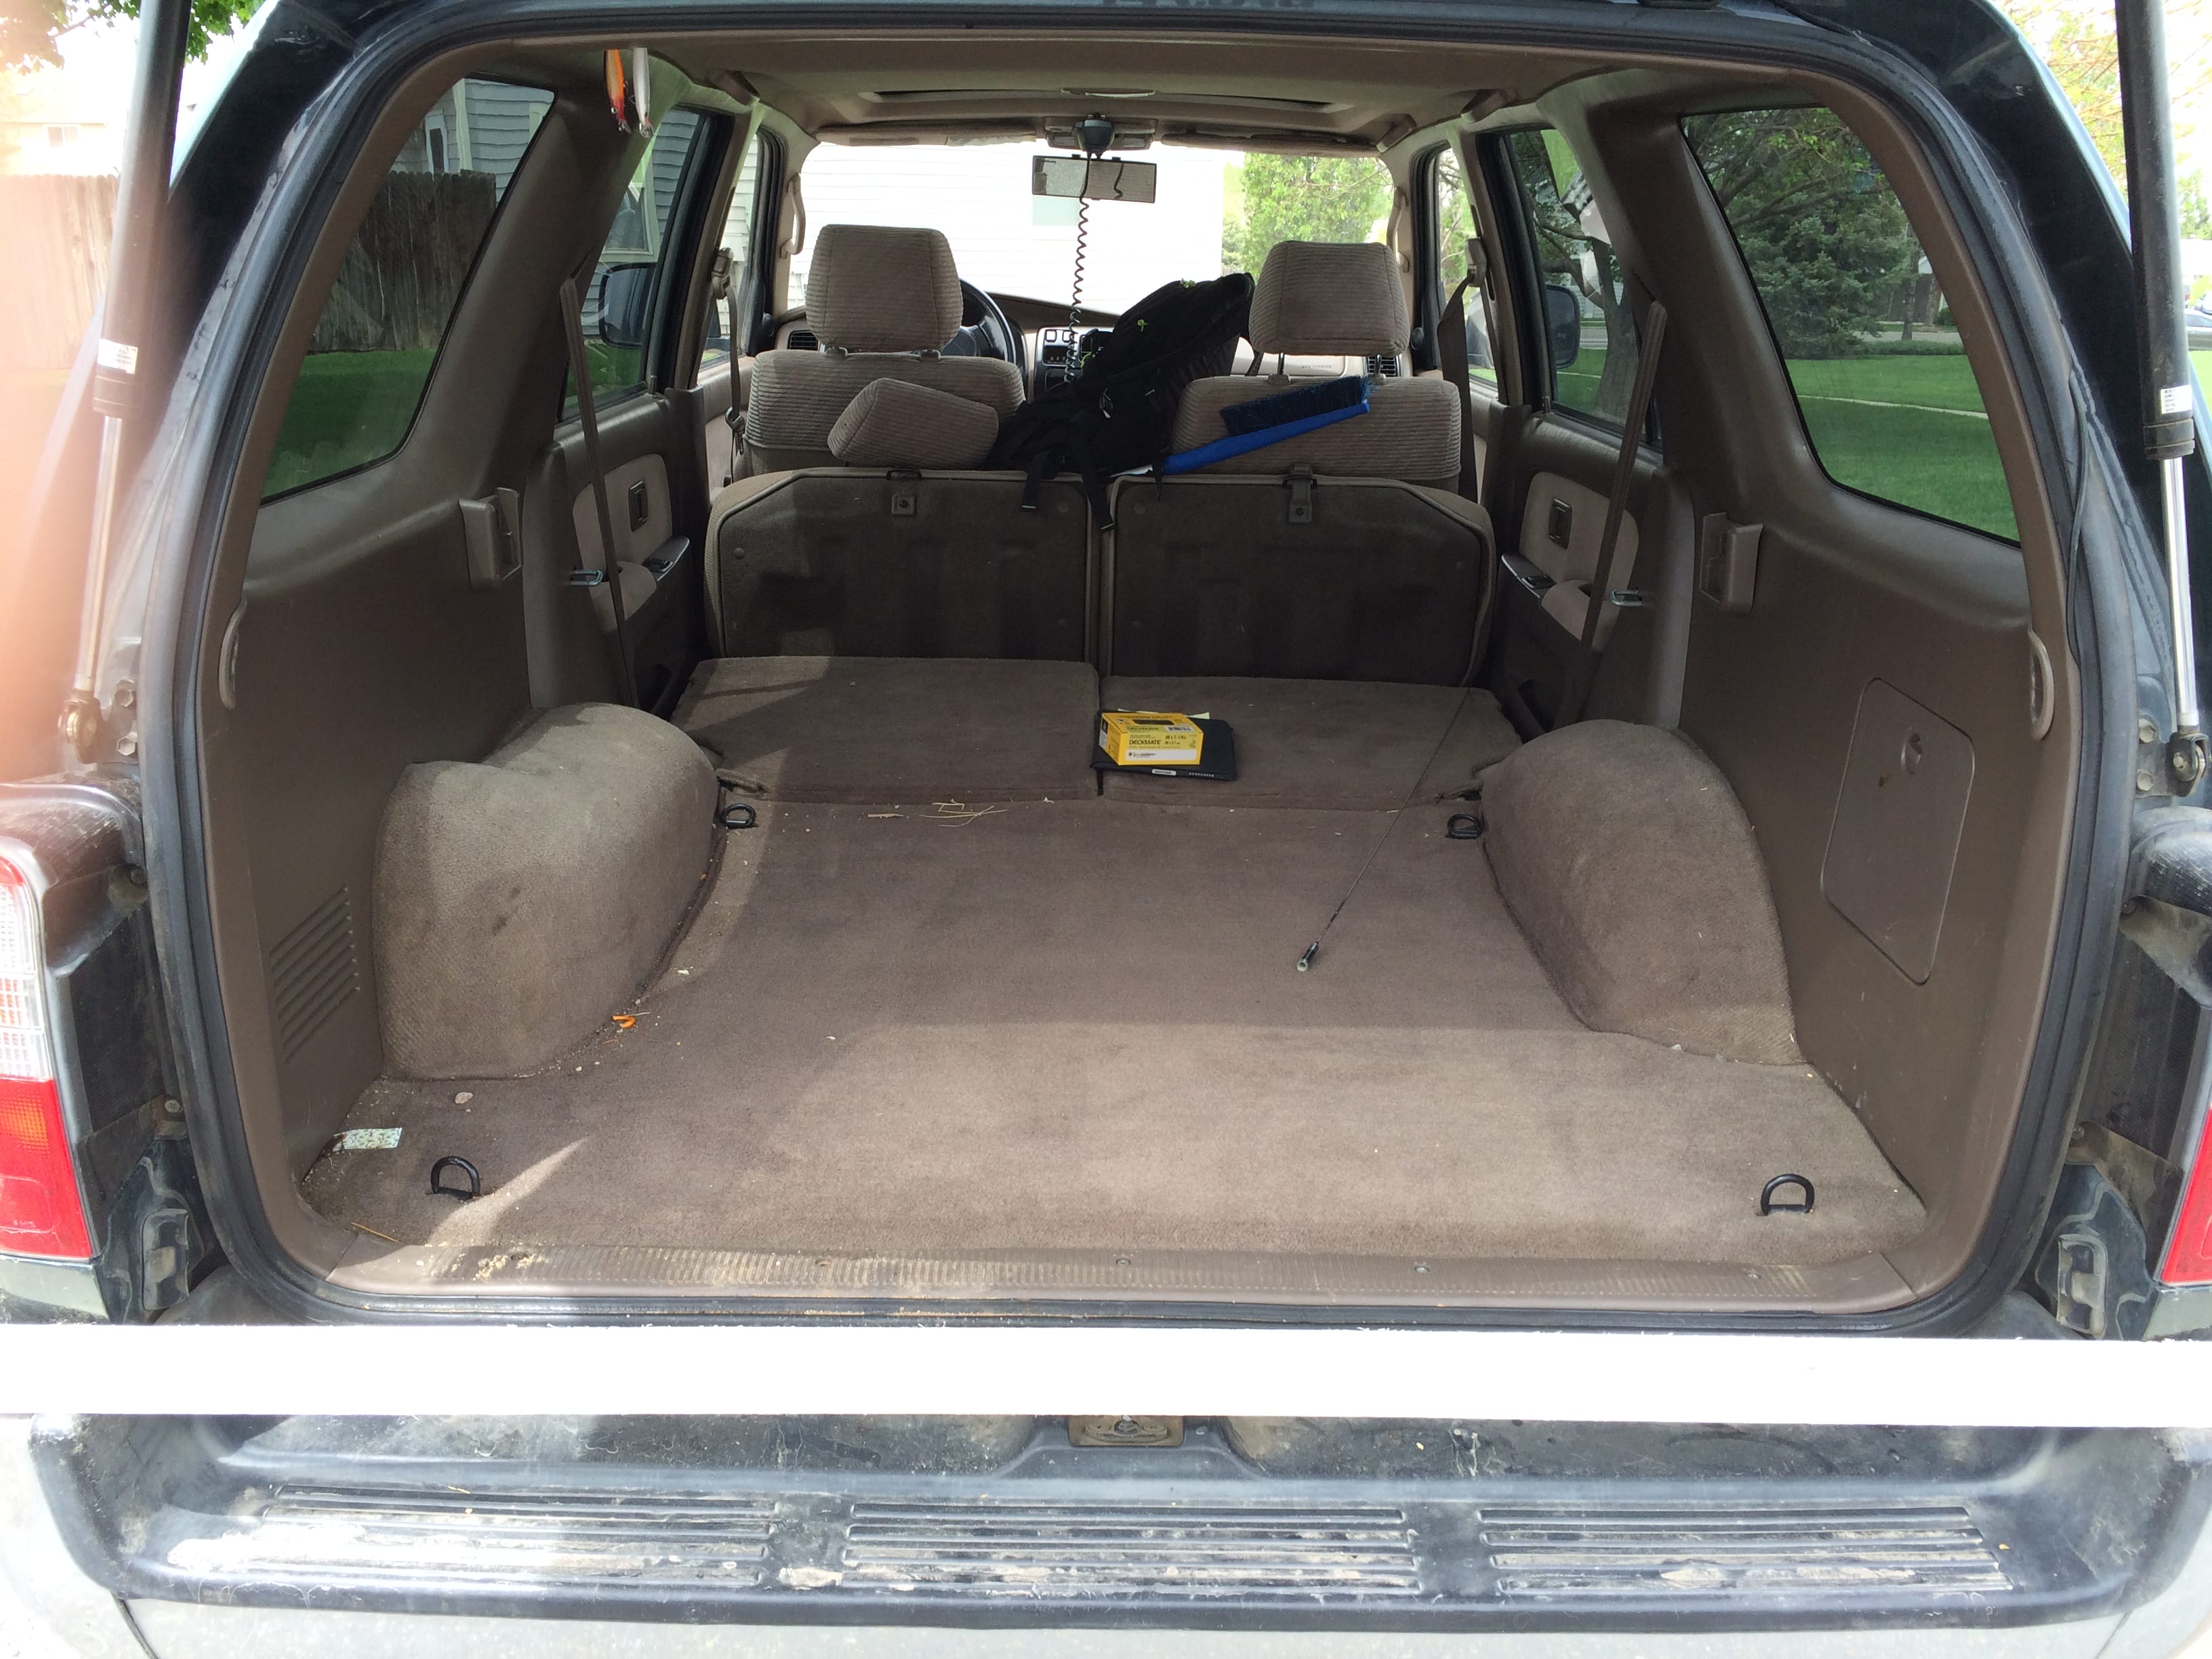
Some background on this project:
This is a custom project I built specifically for my 97 4Runner. I built this to solve two problems: 1) To keep my gear organized, out of the way and create more space 2) To have a more comfortable sleeping area for two. I do a lot of fishing, car camping and road trips so it’s nice to have something I can essentially live out of comfortably for a weekend at a time.
I recommend watching this youtube video that I posted that shows how this works to give you an idea of what you can expect (sorry for the bad audio):
This project was a lot of fun but also took a lot more time than I previously anticipated, so make sure you give yourself a good two full days to complete this if you’re an amateur like I am. As you’re reading through this write-up, I’m sure you’ll see things that you would do differently, so please do so if you feel it will better suit your needs. One thing I want to mention, is if you plan on adding rails to your shelves (I opted out) you will need to make exact cuts and measurements. I used a jig-saw on this project so some of my cuts didn’t come out perfect and therefore decided against adding rails to my shelves (more info below).
Approximate cost in materials: $250
What you need
Tools:
Power saw and/or jig saw
Electric sander
Electric drill
Measuring tape and stick
Marking pencil
Hardware:
3 large sheets of 3/4″ plywood
2 large 1.5″x1.5″ wood beams
Assorted wood screws and nails ranging from 1″ to 2 1/4″.
Outdoor/Indoor carpet
3M sprayable adhesive
Long Hinges 100″ total in length (can’t remember what they’re called, see pictures for reference)
16 strong woodworking “L” brackets
2 lay flat cabinet handles
Step 1: Building the Frame
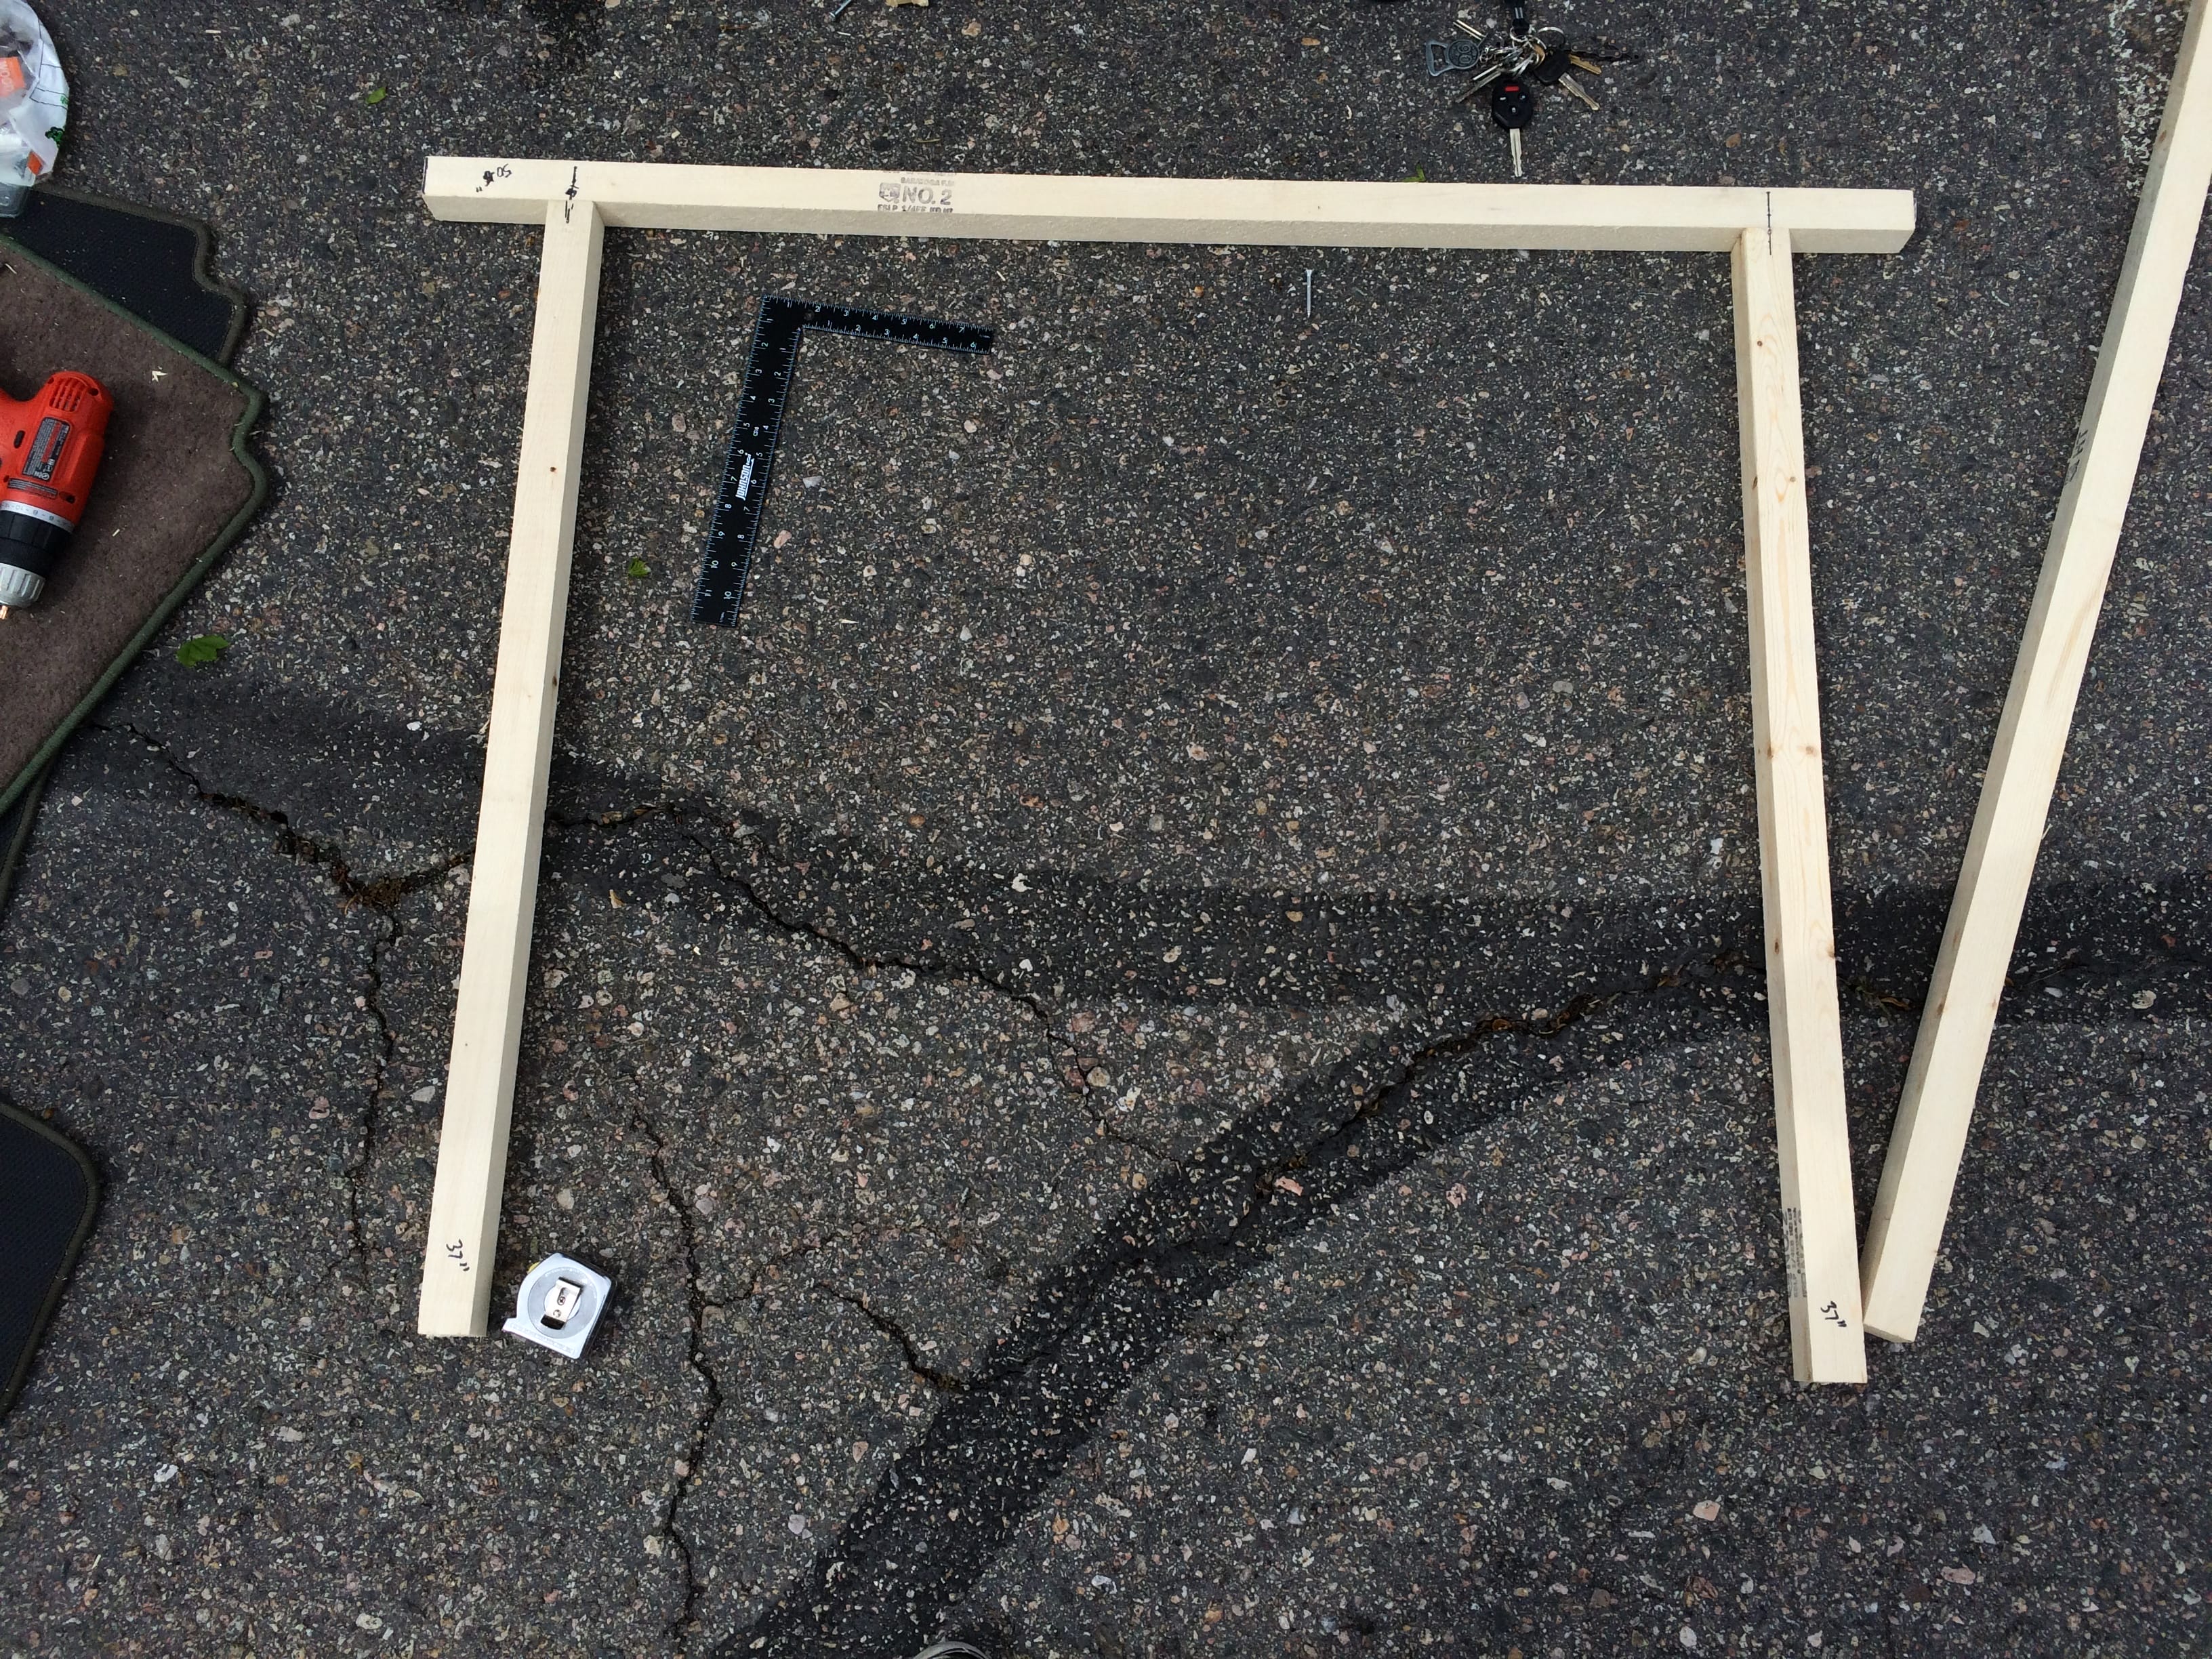
 First you will need to cut three sections of 1.5″x1.5″ beams: two 37″ sections and one 51″ section, and connect them accordingly using wood screws. Connect each piece 5 1/4″ away from the end of the 51″ piece as shown in the photo below.
Next, measure and cut out 3 sections of plywood measuring 9″x 36 1/4″ each and one section measuring 9″ x 37.5″. The 3 9 x36 1/4″ sections will run lengthwise along the frame, and the larger section of the four will act as the back to the frame.


Start by attaching the larger portion to the back of the frame on the inside of the 1.5″x1.5″ beam using screws, making sure it’s flush with the top of the beam. Two pieces of the smaller sections of plywood will be mounted flush with the 1.5″x1.5″ beams on the inside, and the remaining piece will be added directly in the middle. Use the photo below for reference. Finish the frame by adding a 1.5″x 1.5″ beam cut at 40.5″ to the front as shown below.

Step 2: Cutting for the top, storage areas and sleeping extensions
Now it’s time to add plywood to the top of the frame, and cut out two sections of plywood for the two storage areas that sit on top of the wheel-wheels. Cut one plywood section measuring 38″ x 38.5″ and two sections measuring 7 1/4″ x 38.5″ each. The large plywood section you just cut will sit on top of the frame. Secure it in place with screws.
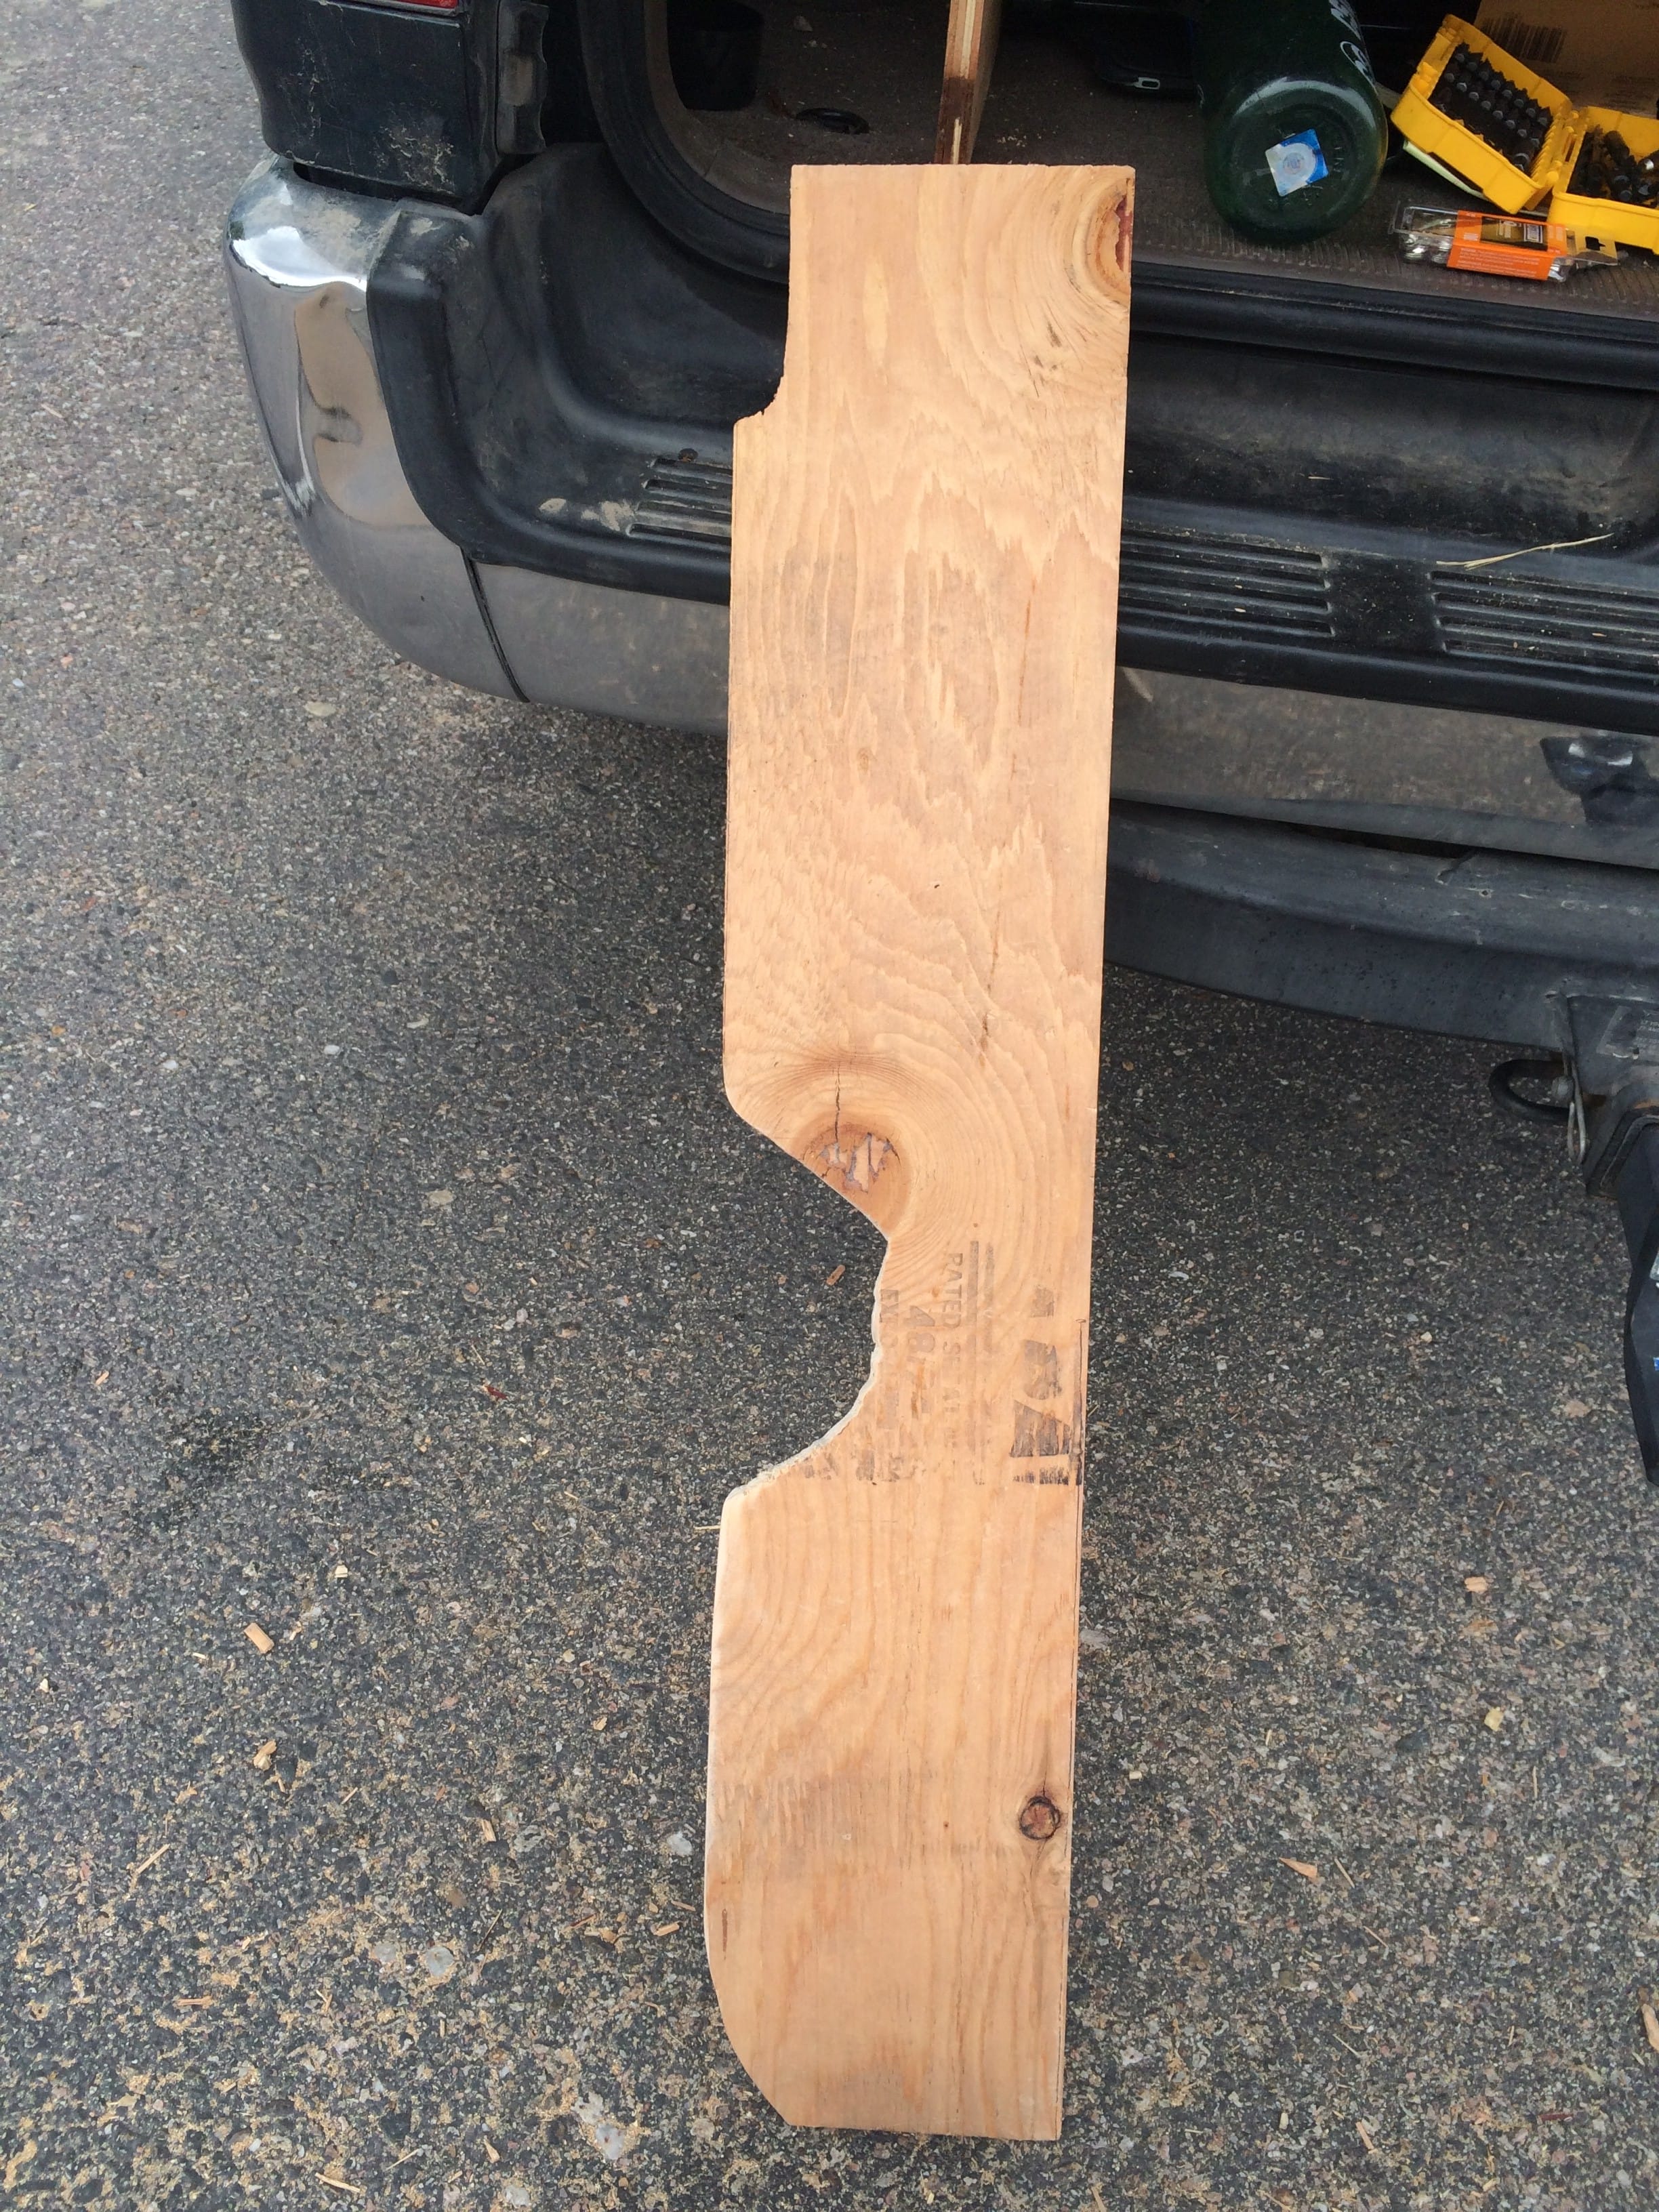
Now comes the tricky part. The two sections of plywood for the storage areas need some modification in order to fit over the wheel wheels and to contour the inside of the car. You will need to make minor cuts and go back and forth to make it fit with your jig saw. on the drivers side, a hole for the wheel wheel needs to be cut as shown below. My recommendation is to lay the wood down first, see where you need to cut, and eyeball it. Use the photo below as a reference. The passenger side will be the same minus the hole for the wheel well.
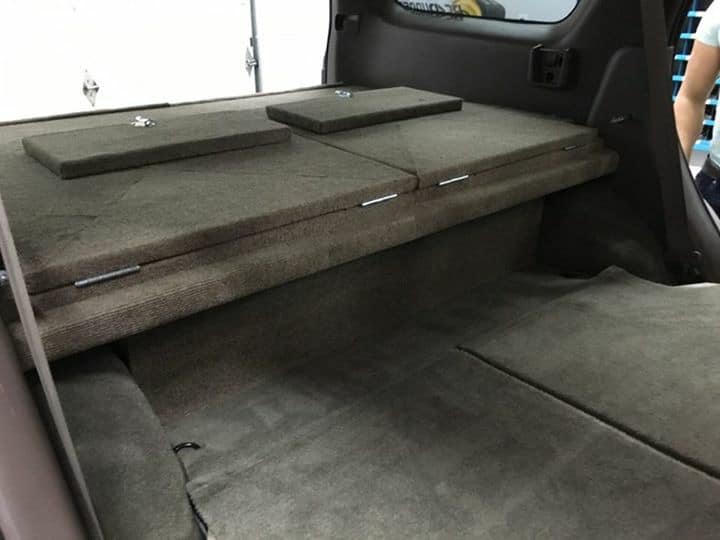
Next, cut out a piece of plywood for the sleeping extensions. The piece of plywood should measure 27 1/2″ x 50″. After cutting, cut the two squares perfectly in half so you’ve created two 24″ sections. At this point, you will need to use your jig saw to trim the corners in order to make them fit, as well as cutting a hole near the bottom so it goes through the brackets on the car that hold the seats in place. Place the sleeping extensions on the edge of the main frame on the beams and test the folding motion. Make cuts as necessary. Use the picture below for reference.

When you’ve done making your cuts, it should look like this:

Step 3: Attaching the hinges and carpeting
Now it’s time to take your hinges and attach everything together so it works as intended. But before we do that, the two storage area plywood pieces need to be carpeted. Cut the carpet appropriately and wrap it so the carpet overlaps on the side facing the wall of the car, and over the front of the storage plywood piece. Do not overlap on the inside portion facing towards the center. Use your adhesive spray to help the carpet stick, and use a variety of small nails and small screws to help keep the carpet in place where you see fit. Or, if you have a staple gun, that would work better. See picture below for reference.
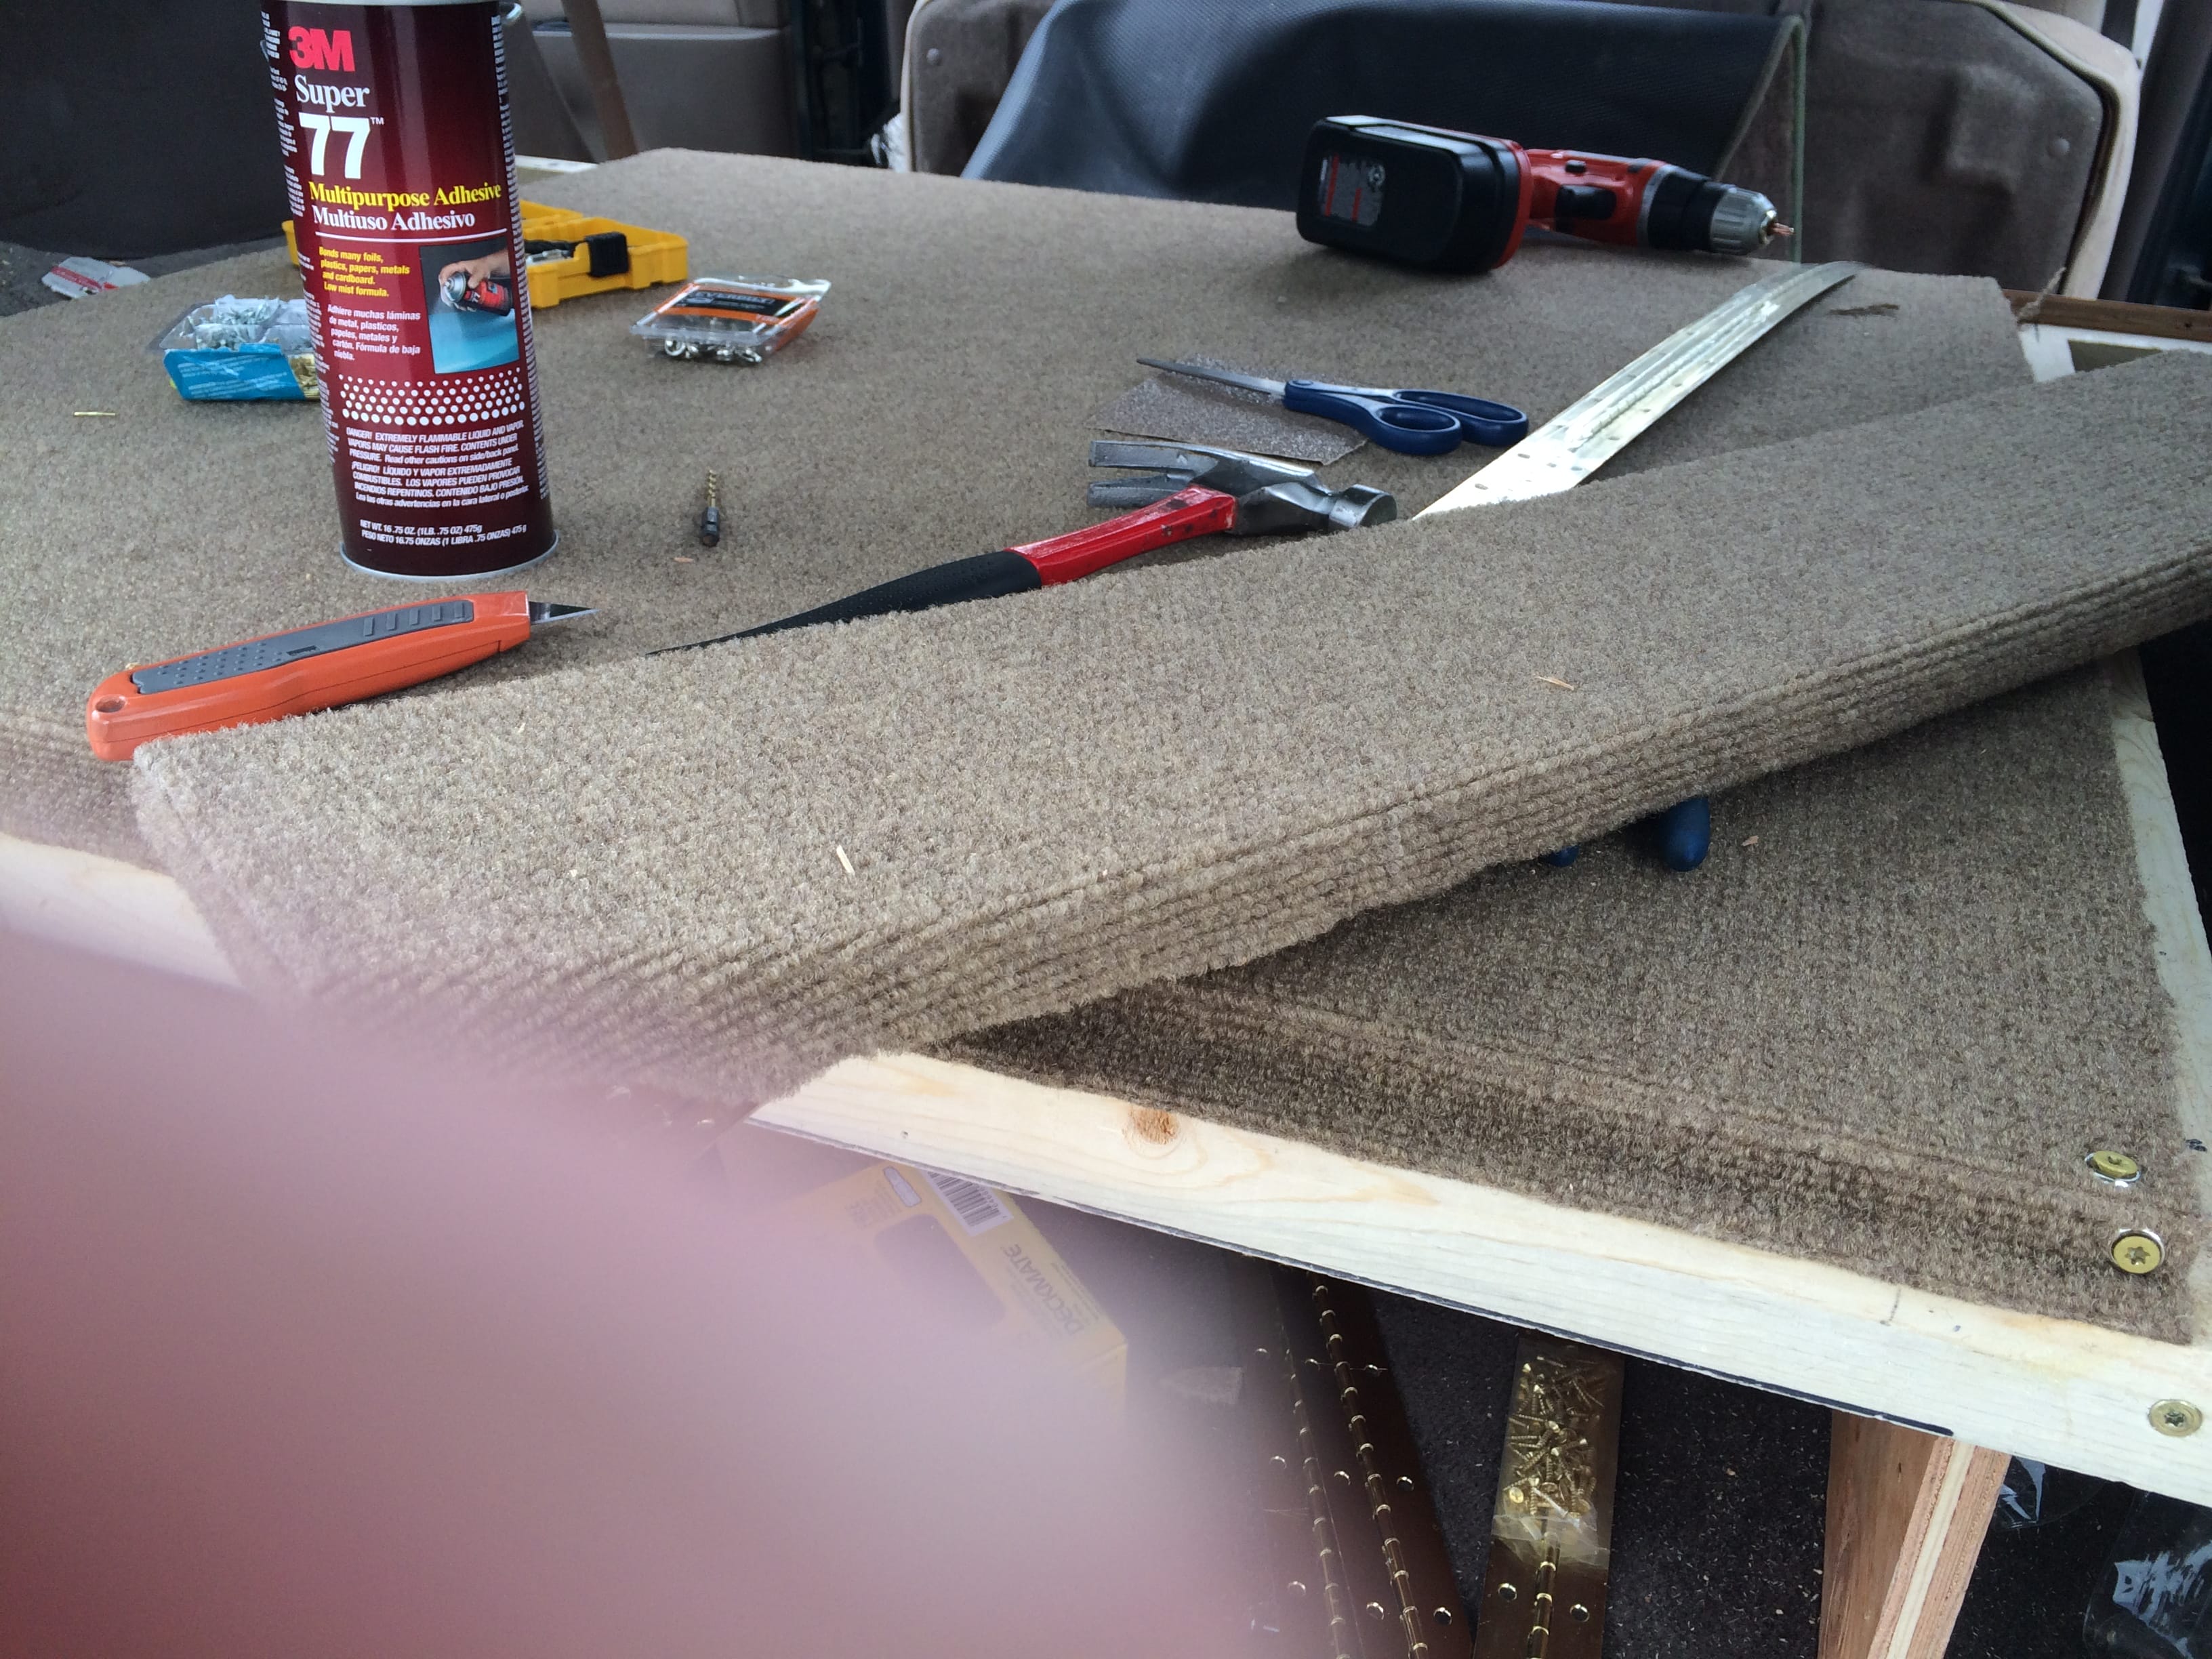
Once you’ve carpeted both sides, you can now attach the hinges. First attach one 30″ section of hinge to both sides of the storage areas. Make sure the hinge portion is directly in line in between where the two sections of plywood meet. For a more discreet look, pull up on the carpet on the edge of the plywood storage section and put your hinge there, as opposed to on top of the carpet.
Once this is complete, attach the two 18” sections of hinges to the sleeping extensions. After this is done, you can carpet the main plywood section and the sleeping extensions. Overlap the carpet on the front of the large plywood section for a clean look. Use your adhesive and small screws as necessary. Use the previous photo for reference.
Tip: Tuck your carpet as close to the hinges as you can for a clean look.
Step 4: Sleeping extension stands
On this step I would recommend getting a little creative here. I’ll post details on what I did for my sleeping extension stands, but if you find a better method please share it with me! Some people have suggested to me that I use hinges on my stands and you may want to do the same.
You will want to cut out 4 6.5″ x 6.5″ plywood squares that will act as the stands for the sleeping extensions. Flip the extensions over on themselves, and attach your stands however far from each other you see fit using “L” brackets. I used 3 for each stand. The picture below shows how I oriented my stands.
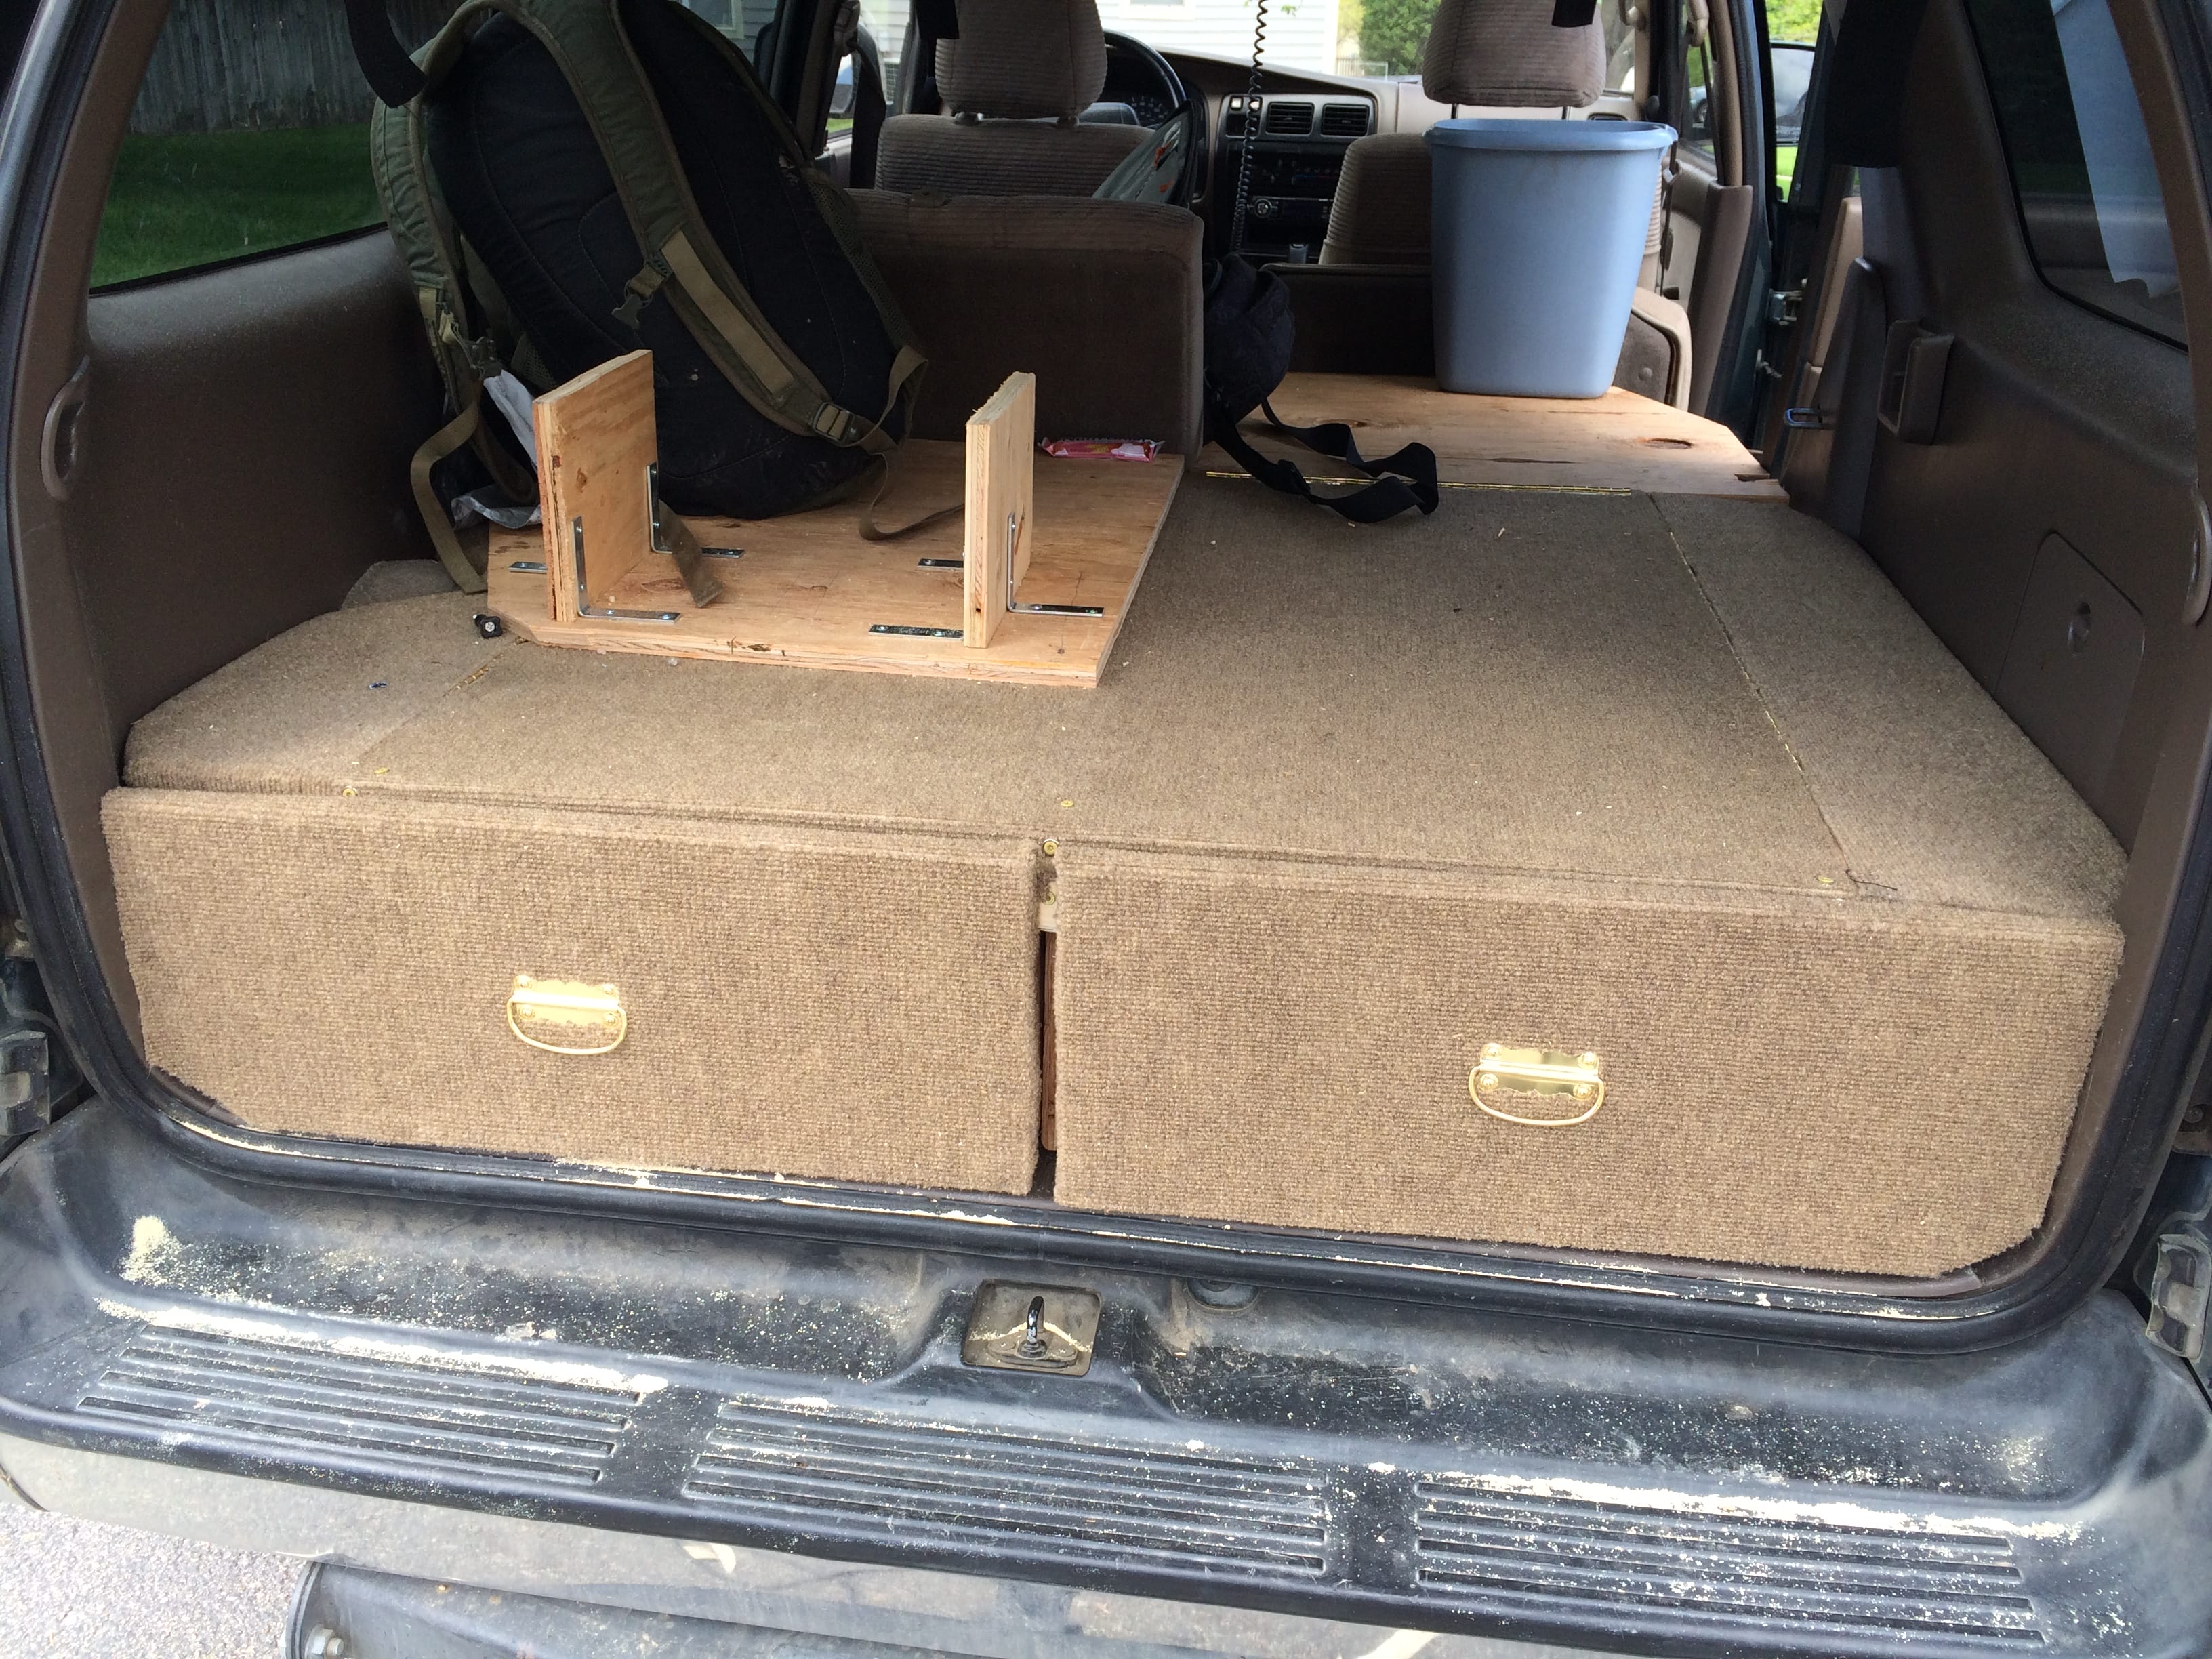
Step 5: Building the drawers
At this point you should have a fully functioning unit with the exception of your drawers. As I mentioned in my intro, I decided against using rails but if you are 100% certain you made perfect cuts you can add rails to yours if you choose. My system works perfectly without rails so I will explain my method.
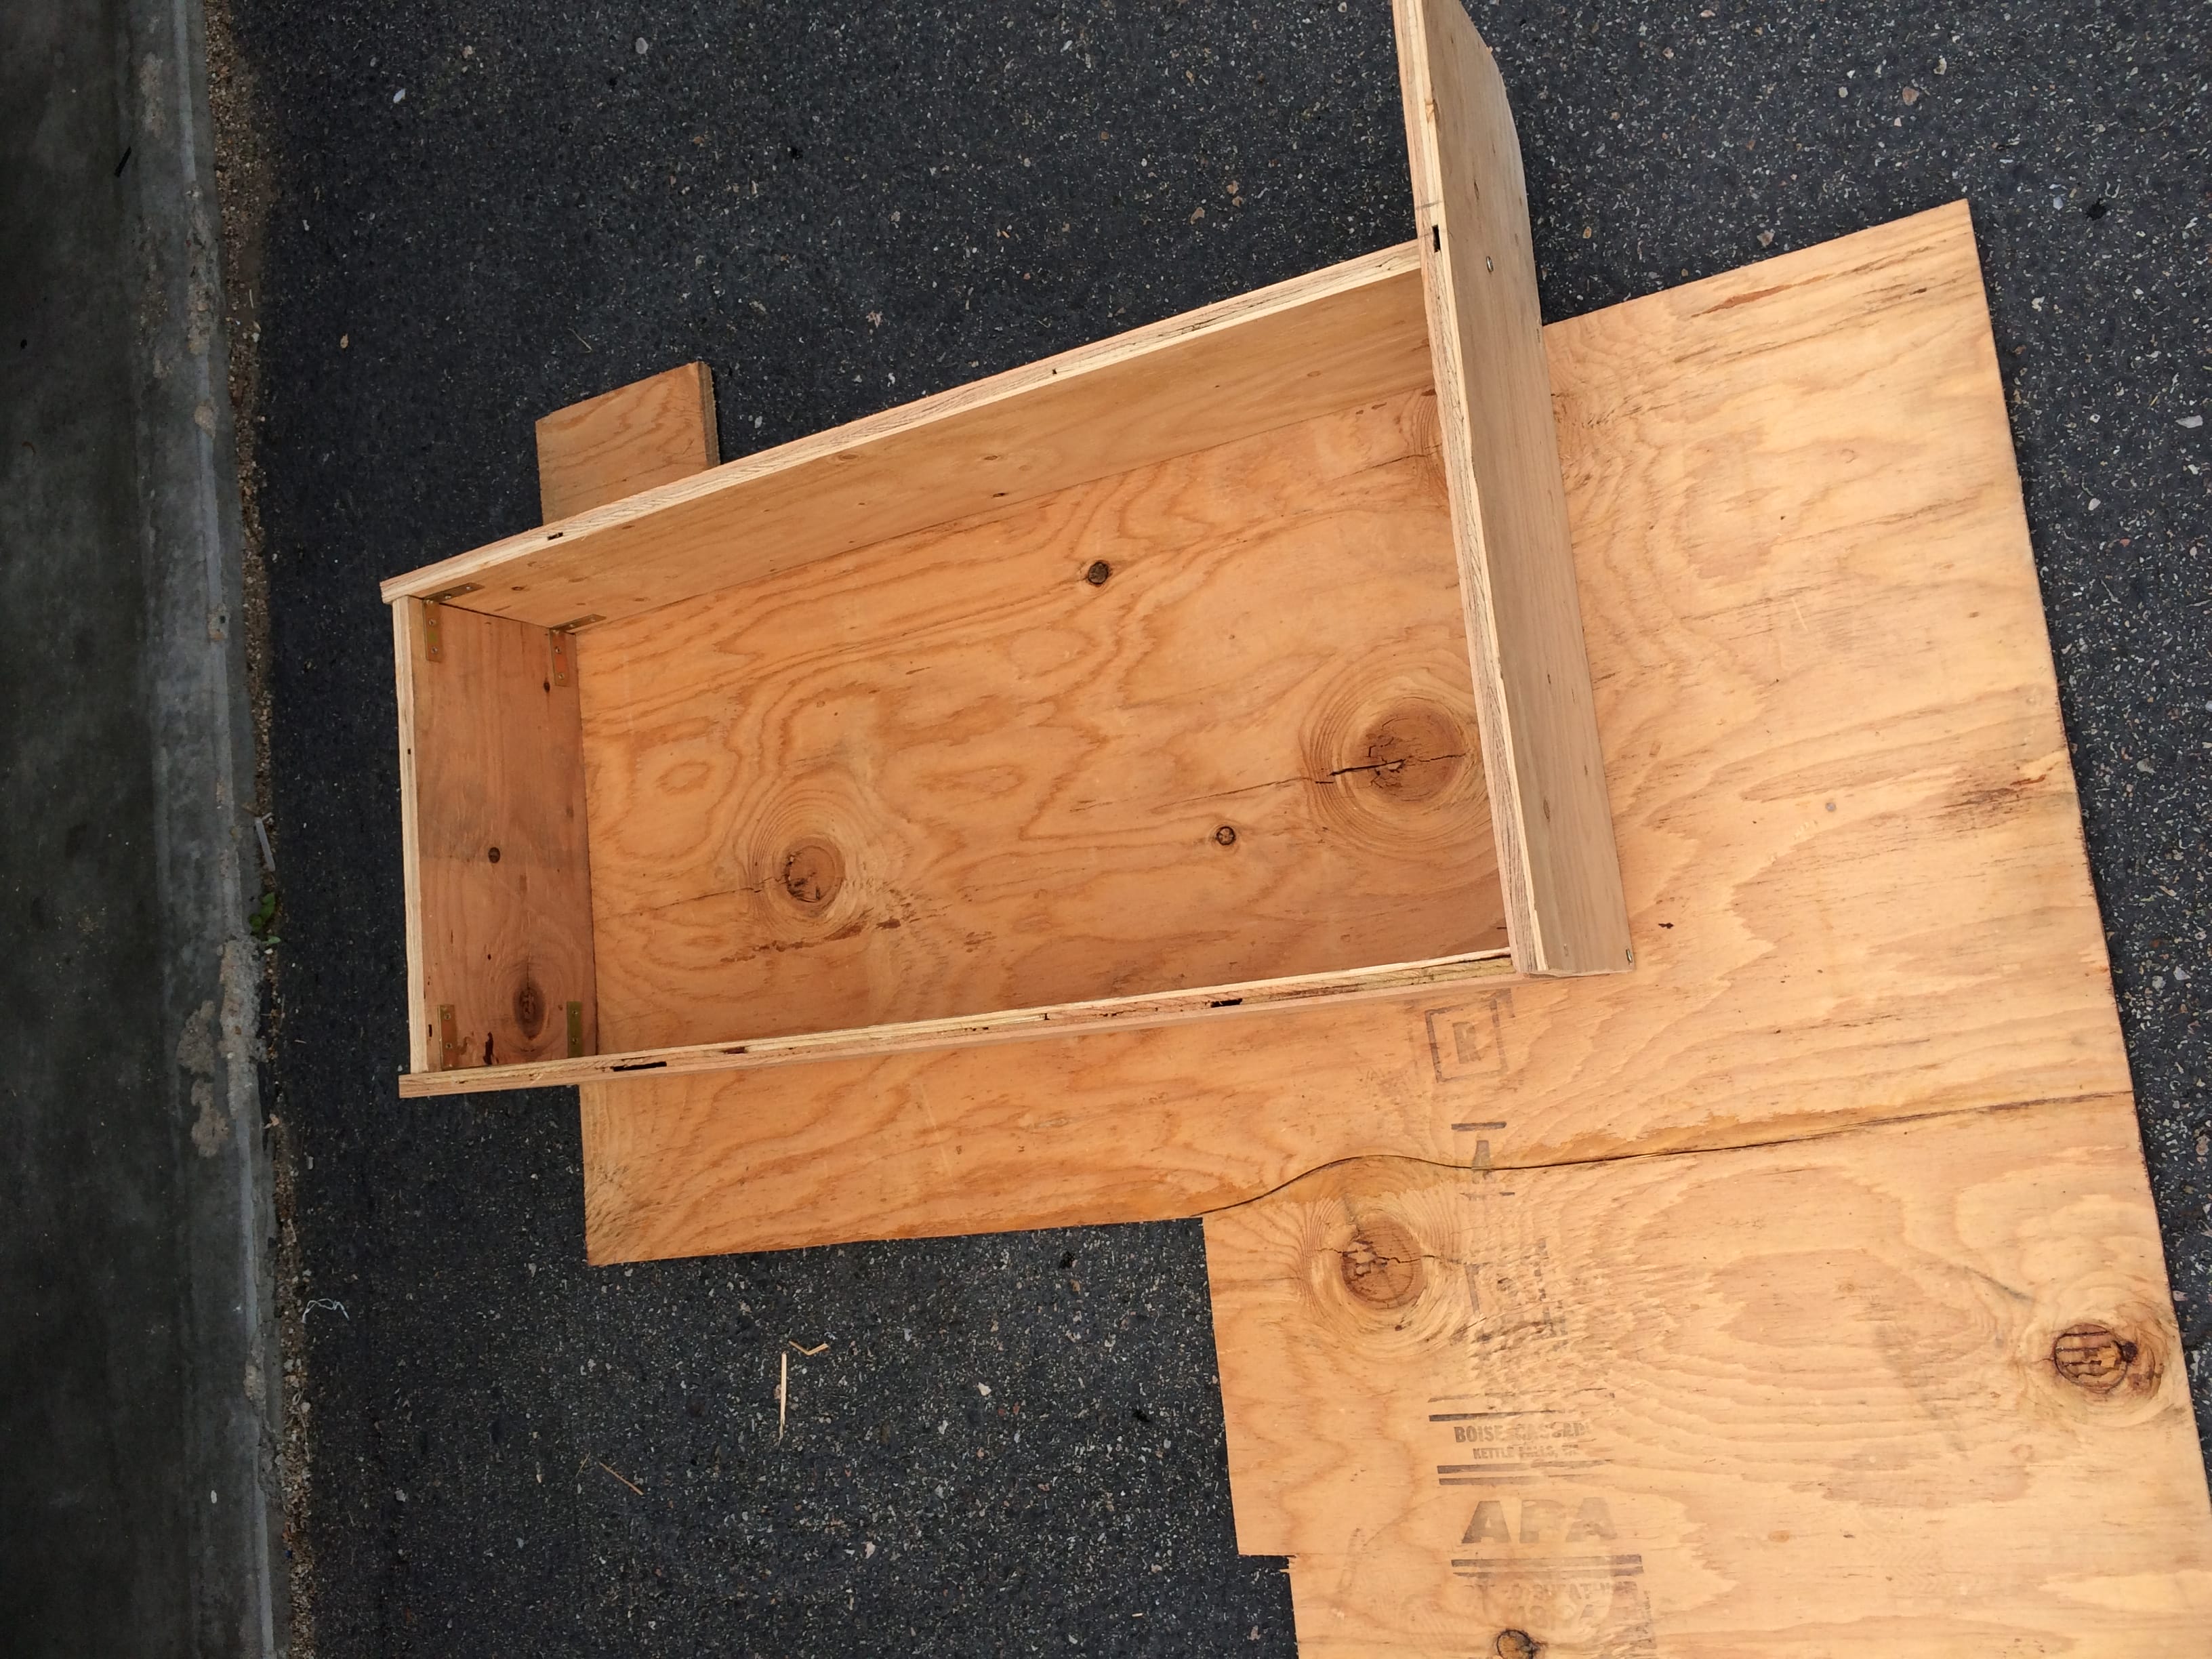
A lot of cutting is required for the drawers. First, you need to cut sections for your frames. Cut 4 35″ x 7.5″ sections for the sides and 2 16″ x 7.5″ sections for the backs. Attach them appropriately using L brackets and screws as shown in the photos below.
Now you’ll create the front of your drawers. Cut a section 48″ x 9″. As you can see from my finished product, there is about a 1″ gap in between my drawers. In retrospect, I wish I would have cut that section a little longer to fill in that gap, so I’d recommend cutting your plywood 48.5″ or 49″ long. Once you’ve cut this piece, cut it in half directly in the middle. At this point, you will also want to round the bottom corners to fit inside the lines of the vehicle. Use your electric sander to smooth the edges. The photo below will show what your finished frame will look like. Make sure the front and back both measure 16″. Attach using L brackets and screws.


Next, you’ll create the bottoms to the drawers. To make my life easier, I placed the frames on top of plywood, traced out the bottom and then cut appropriately. Once you’ve made your cuts, attach them to the drawers using screws (if you have wood glue, use this as well).
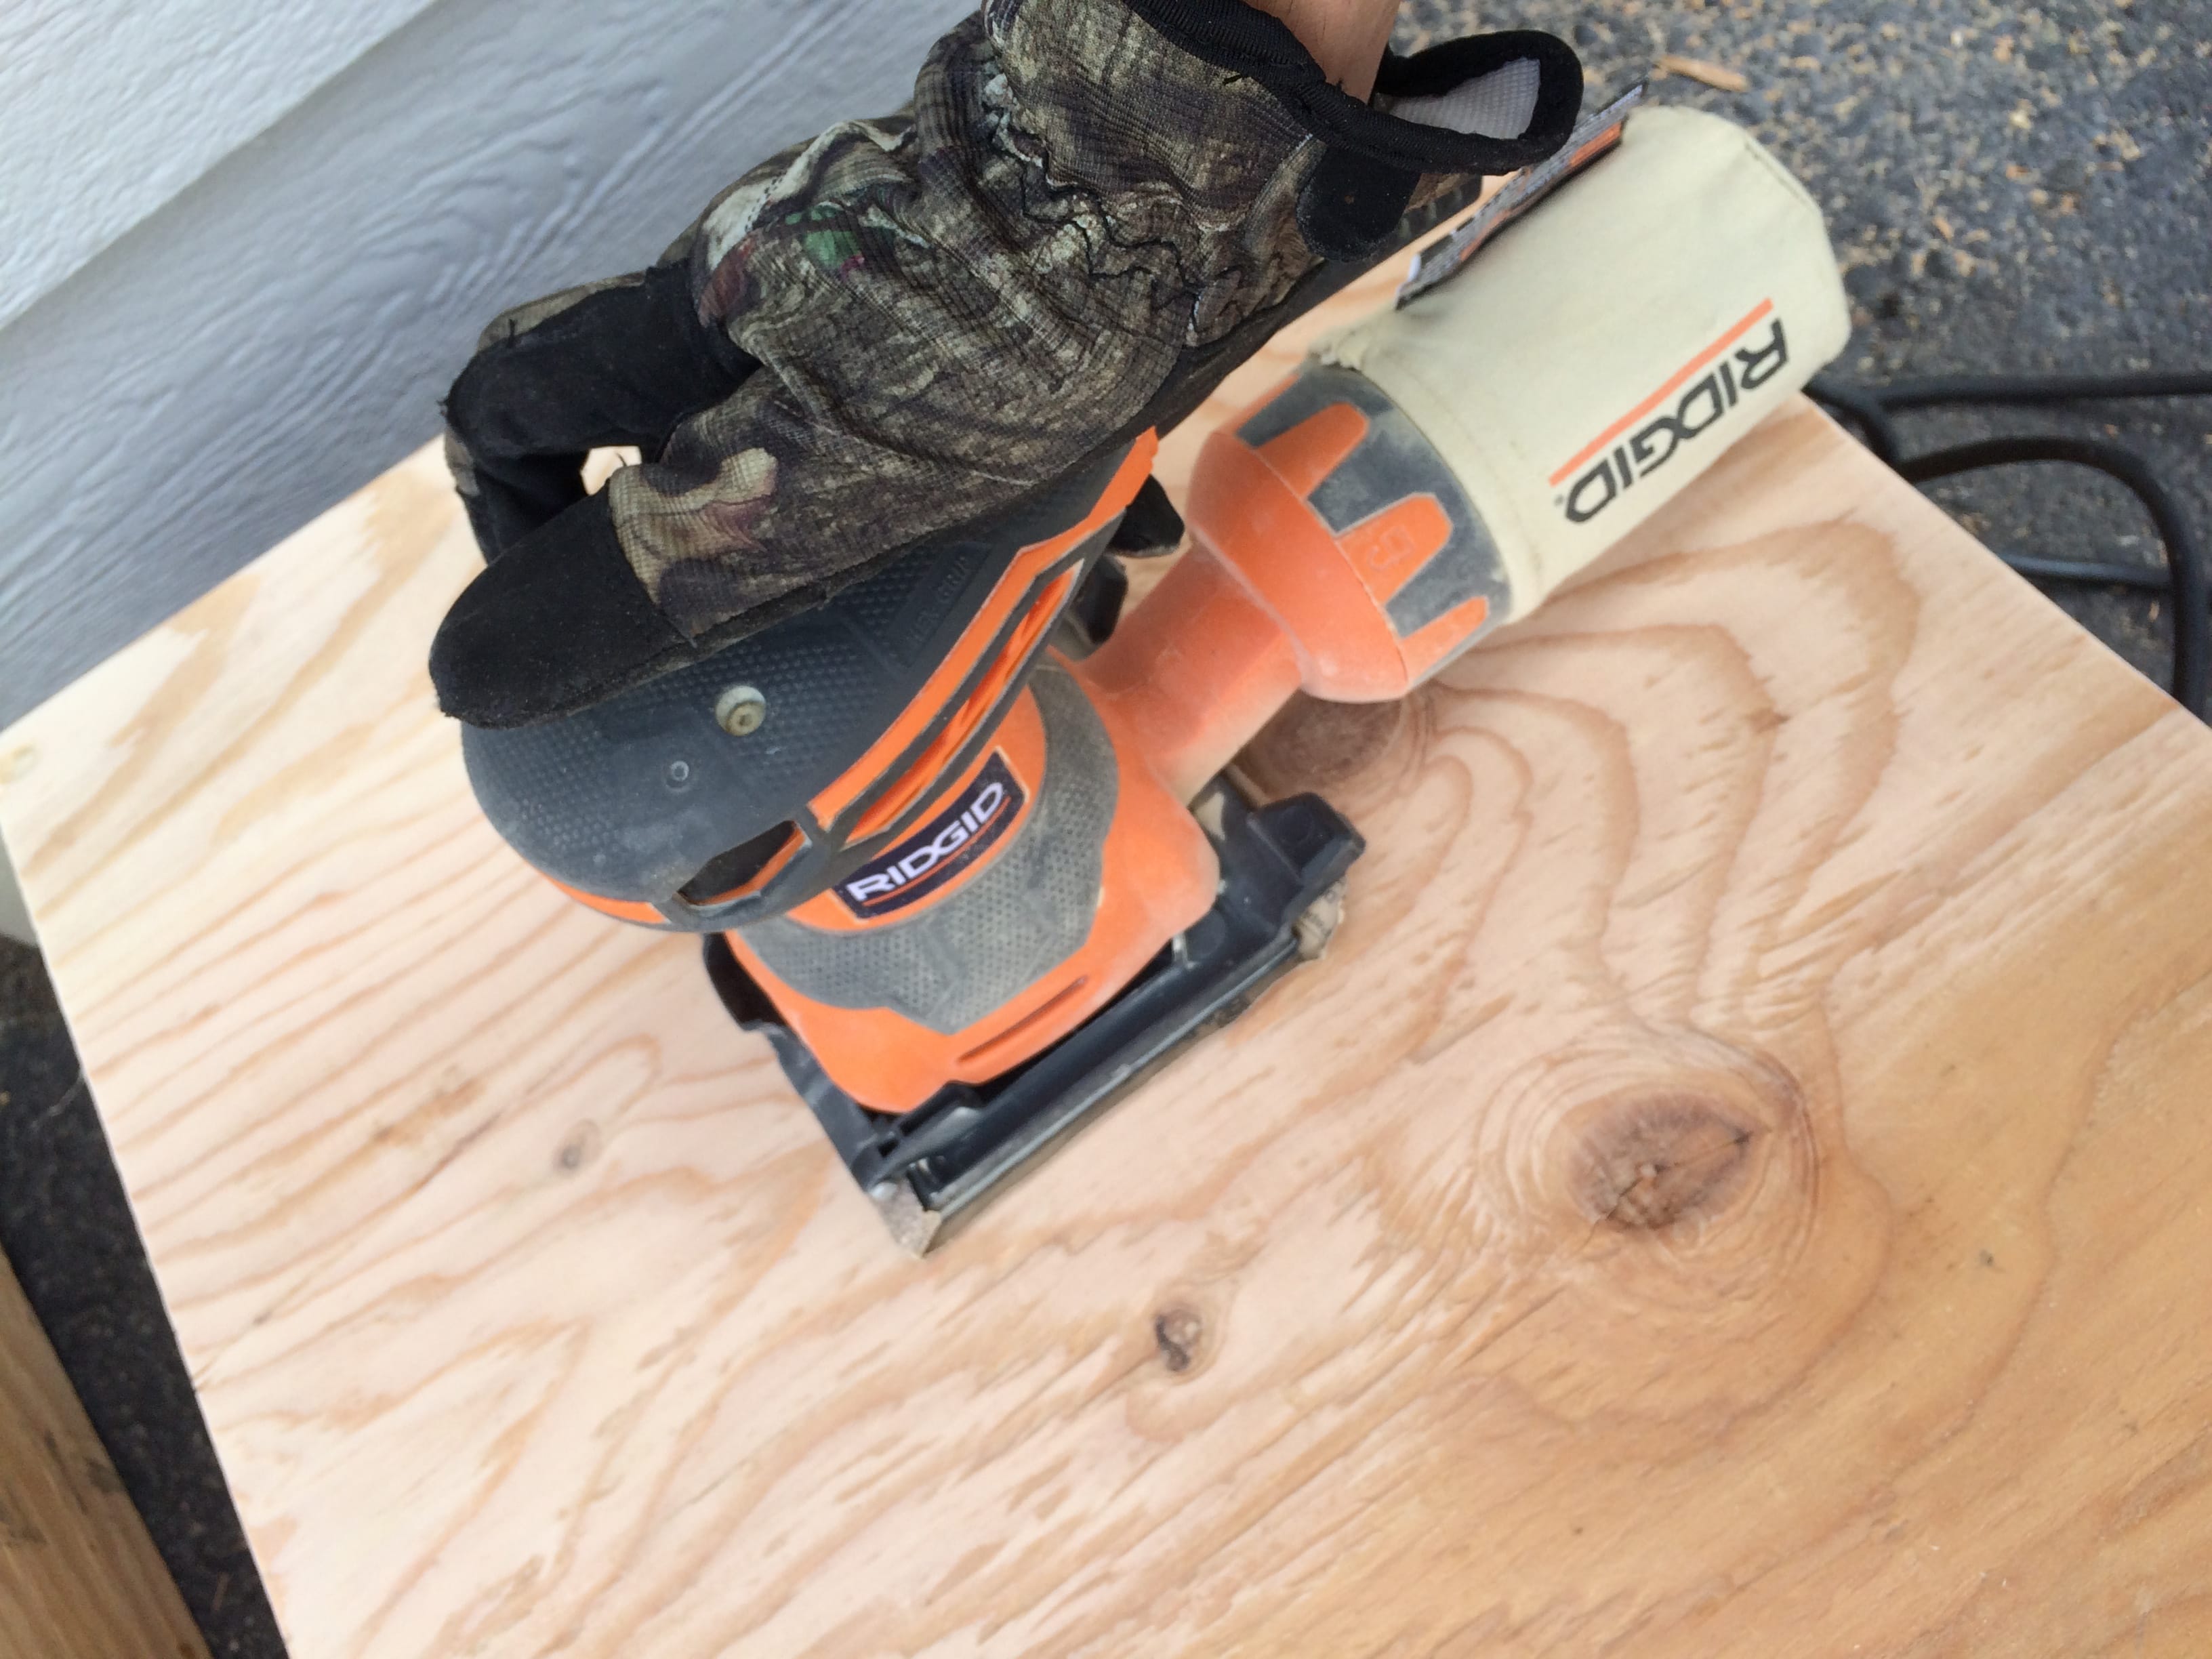
Next, I recommend using some rough grit sandpaper and your electric sander to smooth the bottom of the drawers. This will make it easier to slide in and out on the carpet. Make sure to first sand width wise, and then length wise. At this point the construction of the drawers will be done. You’ll notice that when you try to slide the drawers in, the tops the drawers will either rub or not go past the 1.5″x1.5″ beam. I took my jigsaw and cut a section out on both sides to get it to fit.
Finally, you’ll carpet the front of the drawers. Before doing this, I would test out your drawers and make sure everything works. Place the front on top of the carpet as shown below, and cut appropriately. I folded the carpet over on the top, and on the side facing the middle. After this, attach your drawer handles and you’re done!

Here are other 4Runner owners that have used my design as inspiration for their own cargo areas:
Courtesy of Scott Bartleman
How did your build turn out? Feel free to email me pictures of your completed project and I’ll post them here to give other 4Runner owners more inspiration. sean@seanlara.com
4/2/19 Update – Since this post I’ve since sold my 4Runner, but I’m thinking of getting back into another 3rd Gen. If that happens, I will be building another one of these and making some design tweaks.