
From 2010-2016, I’ve photographed almost 200 weddings and have had hundreds of hours of experience on assignment for a variety of publications. As a result, I’m able to walk into any assignment with a game plan feeling prepared. Over the years I’ve found a general “system” that I follow for almost every wedding which keeps my stress level low. This guide is a mental checklist that keeps me organized and I’m hoping it will help other photographers in the industry who are starting to get more serious photographing weddings, or have been in the business for some time but want to switch up their approach. This will also cover what equipment I bring to every wedding, my lens selection, and lighting techniques.
How to Photograph Weddings: The Complete Guide
Planning the Day
To ensure the success of your photographic coverage, the best thing you can do for yourself is to plan ahead. About a month before the wedding, I will get on the phone with my clients and map out the day. By doing this, there is no confusion on either side as to where I need to be, and it gives me an idea of how much time I will have to get certain shots. This time I have to plan out the day with the bride and groom will allow me to create a photography timeline.
Photography Timeline
When planning the photography portion of the wedding with the bride and groom, the first two questions to ask are: What time is the ceremony? and Are you doing a “first look”? The answer to these questions are going to help determine the timeline of the day, and how to structure the photography around it.
Here is a sample timeline of how I structure the day to give myself plenty of time for photos. Obviously these are very rough times, but this is generally how I build the timeline for each of my weddings. This is for a traditional wedding with the bride and groom seeing each other for the first time at the ceremony:
12:45pm – Arrive at venue, scope out potential photography spots. Introduce yourself to coordinator and other vendors.
1:25 pm – Say hello to bride and/or groom, begin setting up gear.
1:30pm – Contracted Photography Starts
1:30-2:15pm – Detail shots of dress, shoes, rings. General getting ready shots of girls.
2:15-2:30 – Brief getting ready photos with guys.
2:30-3:00 – Bride puts dress on, capture photos. Pull bridesmaids and available family out for posed photos.
3:00 – 3:15 – Pull groomsmen and available family out for posed photos.
3:30 – 4:00 – Capture detail shots of ceremony site, reception area, and venue. Set up equipment for ceremony.
4pm – Ceremony
4:30-5:30pm – Cocktail Hour. Posed family portraits. Posed bridal party portraits. Bride and groom photos.
5:15 – Setup Equipment in reception area.
6pm – Grand Entrance. Begin reception photography coverage. Photography timeline is at mercy of DJ from here on out.
If the bride and groom ARE doing a first look, I’ll typically start the photography coverage about an hour sooner. This allows me to get all of the bridal party photos done before hand, some of the family shots, and gives me the opportunity to go off-site with the bride and groom if they choose to do so. In addition, the bride and groom can spend more time mingling with family and friends during the cocktail hour. Everything else on the timeline typically stays the same.
Equipment List
For the first two years of my career, I shot with only a 70-200mm and a 24-70mm and was able to get the shots I needed. However as I progressed and found new opportunities with different gear my style changed, and so did my equipment. Everyone has their own personal preferences for what they like to use, so it’s best to utilize what you prefer and works best for both your style of shooting and budget. Because I’ll inevitably get asked the question, this is what I currently bring to all my weddings as of 2017.

Primary Camera Bodies:
Nikon D750
Nikon Df
Nikon D3s
Nikon D80 (infrared converted)
Backup/Secondary Bodies:
Nikon D700
Nikon D300
Nikon D7000
Lenses:
Nikorr 70-200mm f2.8 VRII
Nikorr 135mm f2 DC
Nikorr 105mm f1.4E
Nikorr 85mm f1.8G
Nikorr 50mm f1.4D
Nikorr 60mm f2.8D Macro
Sigma 24-35mm f2 ART
Nikorr 10.5mm fisheye
Nikorr 24-70mm f2.8
Nikon 20mm f1.8G
Lighting Equipment and Accessories:
7 Godox speed lights with built in radio triggers
Magmod diffusion system
Two Light Stands
Manfrotto Tripod
Lowepro Pro Roller Camera Bag
Black Rapid Double R Strap
Lowepro Waist Pack
Photographing Each Main Event:
This is a general breakdown of what equipment and lighting techniques I use for each of the main events of the day, as well as my approach. Obviously everyone will have different ways of doing things, but this is a proven method that works for me for almost every major wedding.
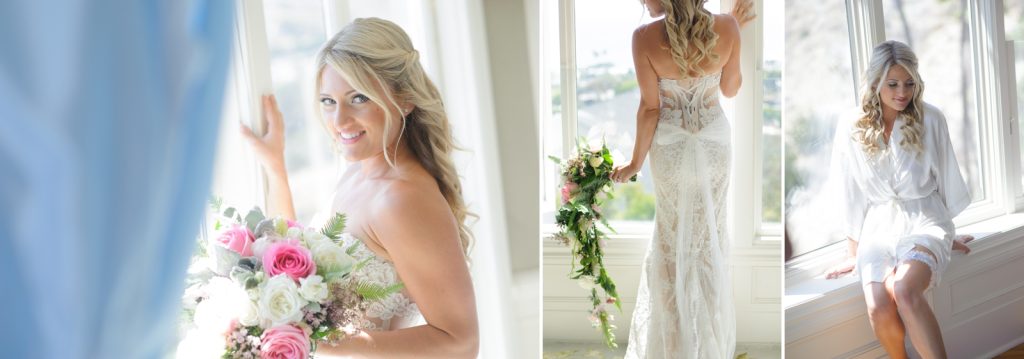
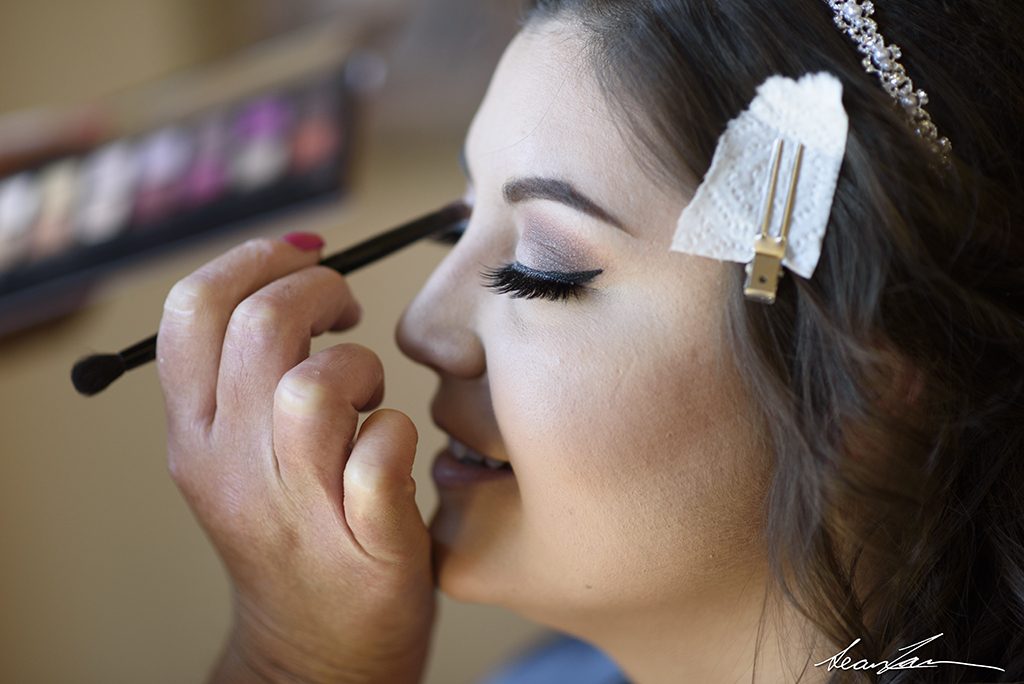
Preparation Photos
Cameras: Full Frame
Lens selection: 105mm 1.4, 24-35mm f2, 60mm macro
Lighting: Mainly ambient light. One flash on camera in the event of a dimly-lit room. Occasionally one light on a light stand for special lighting techniques.
My Approach: This is the portion of the day I will capture the majority of my photos with ambient light. My 85mm is my go-to lens, as it’s sharp, captures natural light beautifully, and allows me to shoot in low-lit situations. I’ll always have this on my camera during this portion of the day as it’s easy to capture quick portraits with, and is the perfect focal range for most shots. On my other body, I’ll have a 24-35mm if I need a wider perspective, or am doing a group photo in a tight space. I’ll also have my 60mm macro lens handy for getting close ups of jewelry and other details. If the light in the room is very dim, or quality of light is bad, I’ll compensate by using a flash on the camera and bouncing it. If there’s no where to bounce, i’ll set up a light on a light stand in a corner, or on a bookshelf/ledge of some sort. Additionally, I’ll use flash to get interesting effects on my subjects. I’ll first start by photographing all of the details (dress, shoes, flowers, rings, etc) and then move on to capturing candid shots of people getting ready.
Ambient window light. 85mm 1.8G. 1/200s, f2, ISO 640
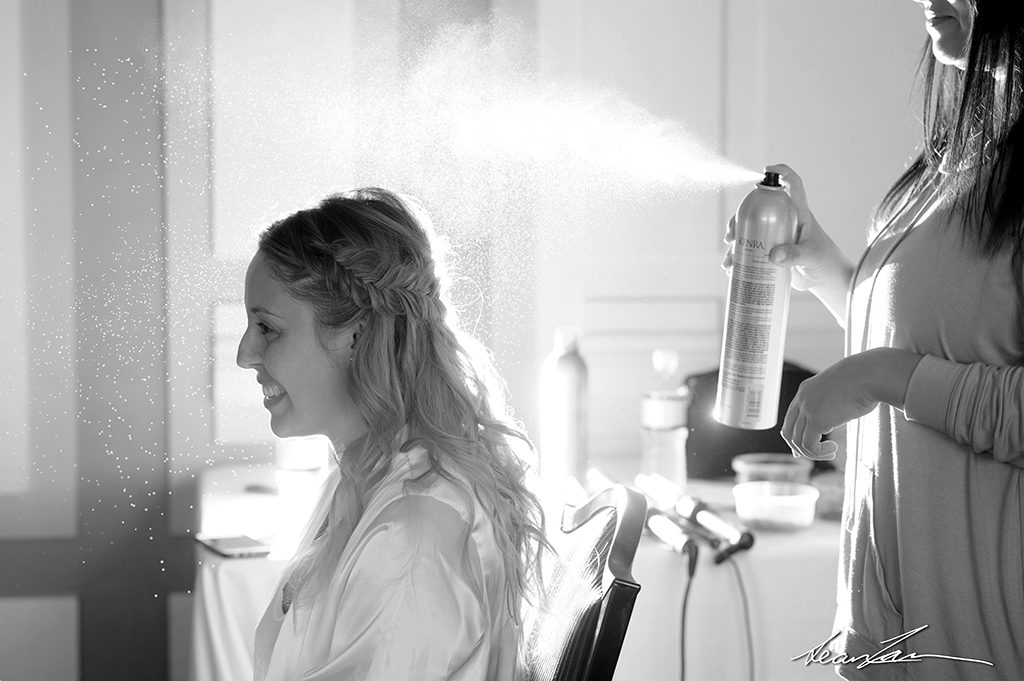
Single flash behind subject. 85mm 1.8G. 1/160s, f2.8, ISO 640

Single flash behind subject. 85mm 1.8G. 1/200s, f4, ISO 400
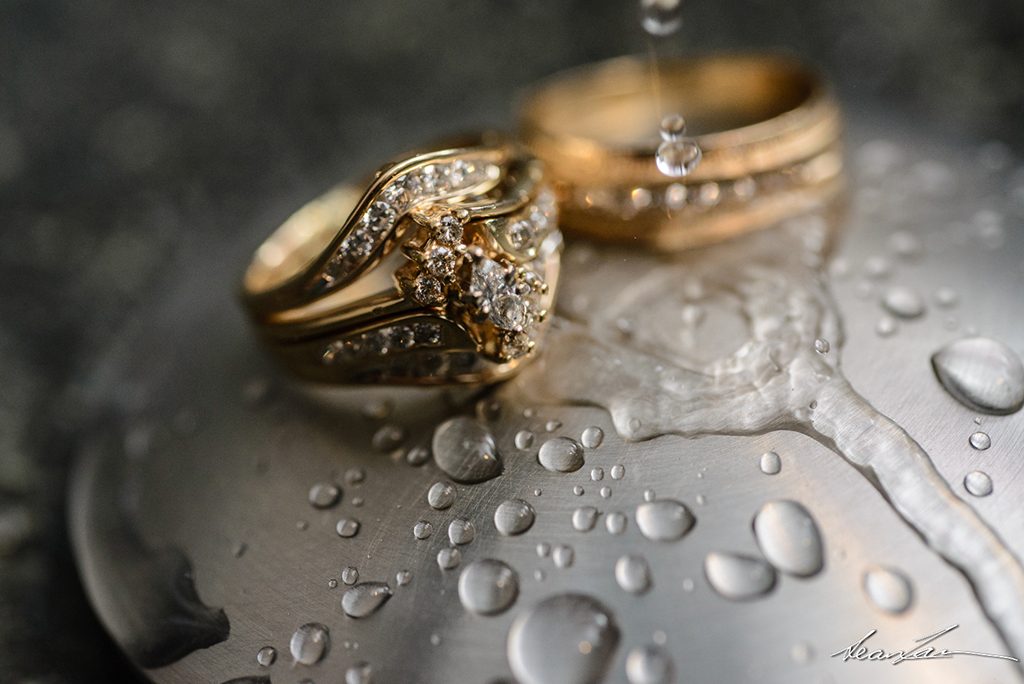
Single flash camera right on light stand. 60mm f2.8D macro. 1/160s, f5.6, ISO 1250
Posed Bridal Party Photos
Cameras: Full Frame
Lens selection: 85mm f1.8 (if large bridal party), 105mm f1.4 (if small bridal party), 24-35mm f2
Lighting: Natural light if possible, additional lighting required.
My approach: When it’s time to pull the bridal party out for photos, I will shoot for natural light, but if the situation calls to use additional lighting, I will always make sure I have at least one speedlight/light stand available. I’ll use additional lighting to create separation between my subject and background, balance my exposures, or as fill flash to lighten up shadows if I find myself in a tricky situation. If the bridal party on one side has less than 4 people, I will use my 135mm f2 lens. If it has more than 4 people, I’ll continue to use my 85mm. I will always try and see if I can get away with using my 135mm first, as I love the bokeh on this lens and the compression it creates, but this comes down to personal preference. Additionally, I’ll have my 24-35mm ready if I need a wider perspective shot.
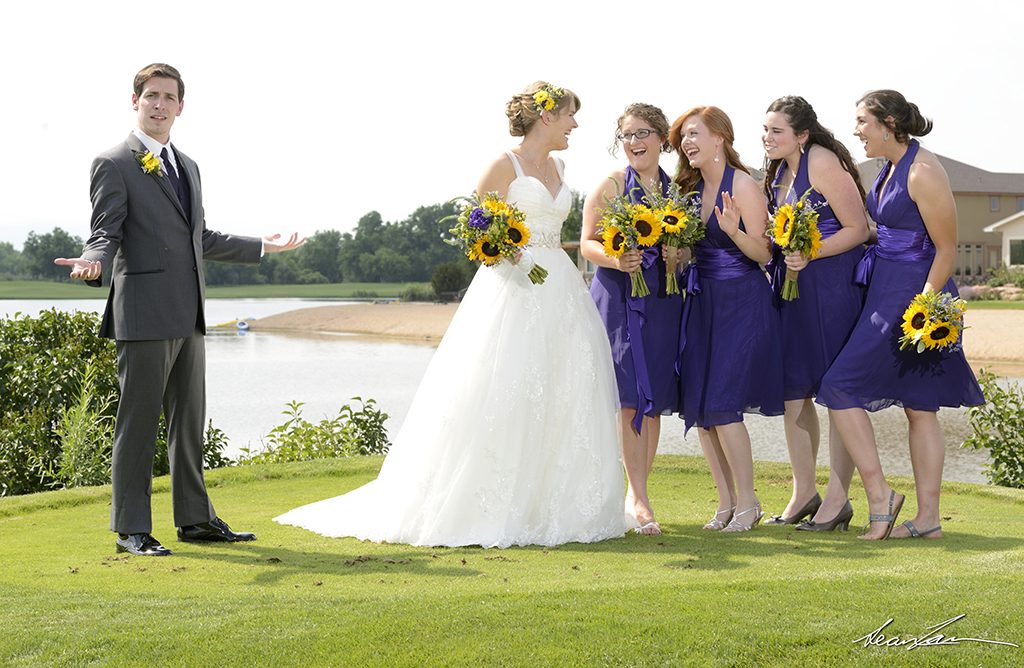
One light off-camera. 85mm 1.8G. Exposing for ambient, flash for fill to eliminate shadows.
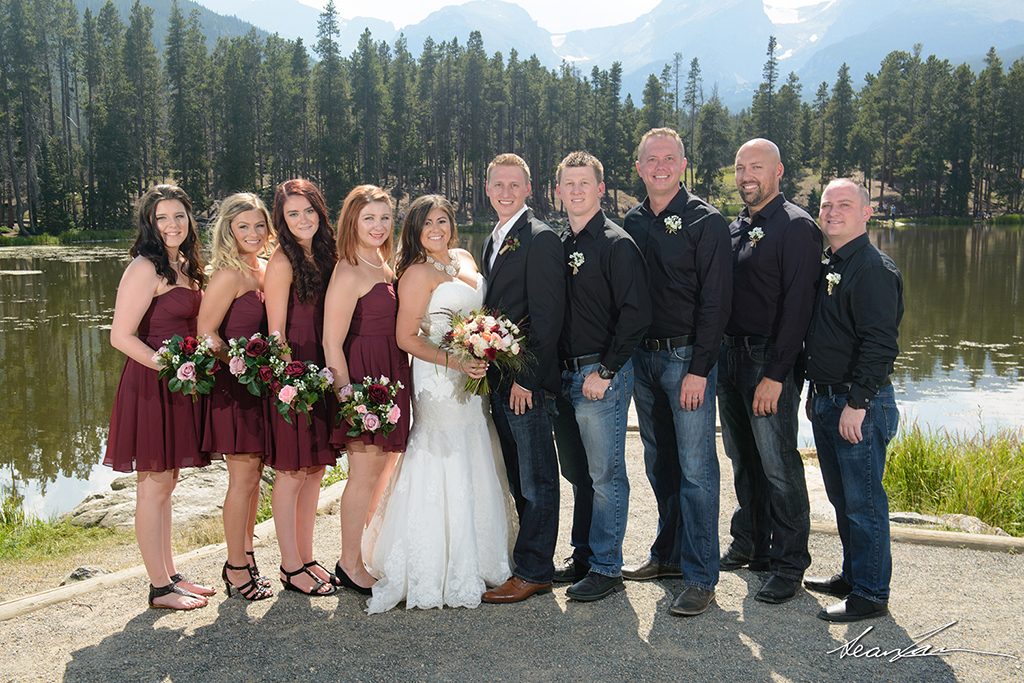
Two lights off-camera. Balancing foreground and background light.
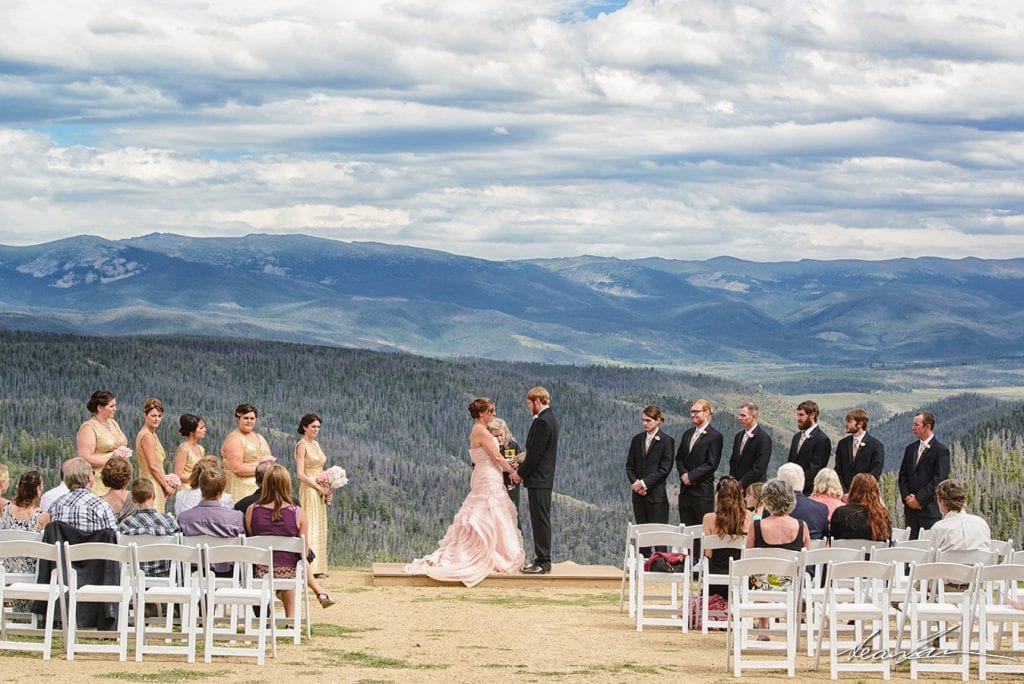
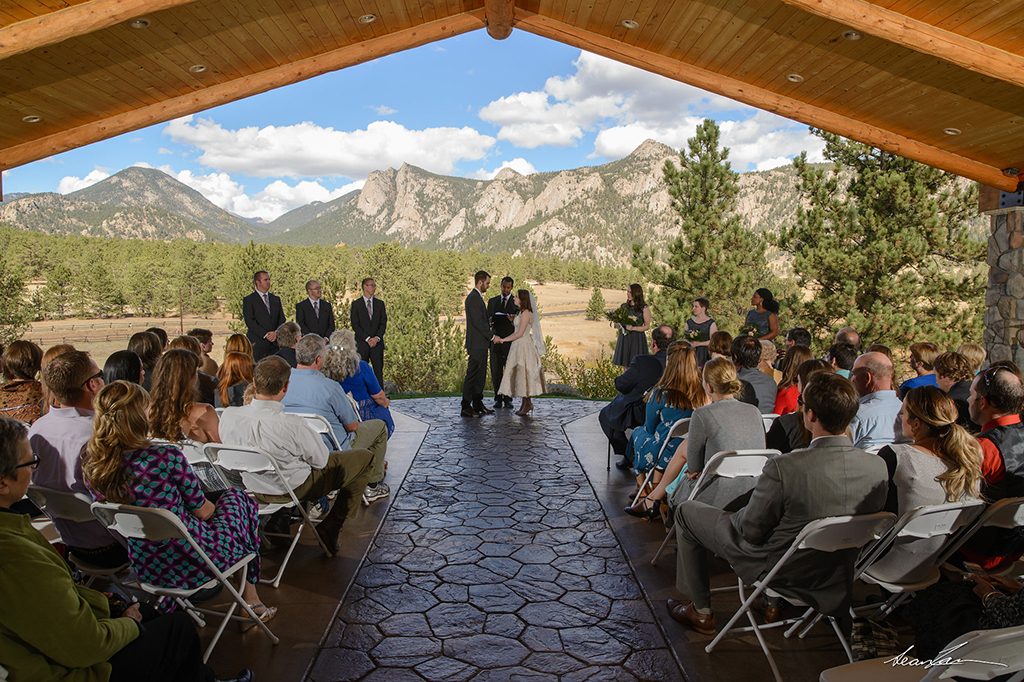
Ceremony Photos
Cameras: Full Frame, Crop Frame
Lens Selection: 70-200mm f2.8, 24-35mm f2, Fisheye Lens
Lighting: Natural light. Very rarely additional lighting.
My Approach: The majority of the shots I take during the ceremony are with my 70-200mm f2.8. It’s a very versatile lens, and will give me the flexibility I need to get a variety of angles and perspectives. I will shoot almost 90% of my photos during this time with this lens, as I’m typically standing behind the guests and need the range. It’s also a quick focuser, and with Vibration Reduction built in, it’s a great choice for low-light ceremonies like in churches. If there are a lot of guests and I need additional reach, I will occasionally swap out my full-frame camera for a crop-frame to take advantage of the crop factor, and get additional reach out of my telephoto lens. I’ll only do this however if the lighting situation is more than idea. In addition to my telephoto, I will have a fisheye lens handy, to get one or two ultra-wide shots, and my 24-35mm if there are any shots that need a wider perspective. Almost every single wedding I capture I only use natural light, however there are some ceremony locations where additional lighting is needed. A great example of this is the Black Canyon Inn in Estes Park. The ceremony location is under a giant awning that at any given time will be 3 stops under exposed compared to the background. In this situation, I’ll set up two light stands to give myself additional lighting, and will use them for a select few shots where I need to balance exposures. However, flash during a ceremony is distracting, so I’ll try to avoid using it as much as possible.
Ambient light. 70-200mm 2.8 VRII
Two speed-lights on light stands camera left and right. Exposing for background, using speed-lights for fill. Sigma 24-35mm f2 A.
70-200mm 2.8 VRII on crop frame body
Posed Family Photos
Camera Bodies: Full Frame
Lens Selection: 70-200mm f2.8, 24-35mm f2, 24-70mm f2.8 (backup)
Lighting: Natural light and additional lighting
My Approach: For the posed family photos, I will use the 70-200mm as much as I can. Using any sort of telephoto lens creates compression and separation from the background, and is flattering to use on people. Even if it means taking quite a few steps back, I will try and squeeze everyone in the frame. If this isn’t an option, I will use something wider like a 24-35 or 24-70mm. As with the bridal party photos, if good natural light is available, that will be my first choice to light a scene. If not, I will have two light stands with two lights to make sure everyone is evenly lit. If I know that the groupings will be small (or if it’s too challenging to carry two light stands) I can easily get away with one light on a light stand paired with a MagMod diffusion dome, or something similar to spread and diffuse light.

Ambient light. 70-200mm 2.8 VRII
Bride and Groom Photos
Camera Bodies: Full Frame
Lens Selection: 135mm f2 or 105mm f1.4, 24-35mm f2, Fisheye Lens (situational), 70-200mm f2.8 (situational – if extra telephoto is needed)
Lighting: Wide variety of lighting techniques are used
My Approach: After all of the posed family photos are done, I’ll politely encourage everyone that’s not the bride and groom to leave (usually the bribe of alcohol being available at the bar works here). At this point, I have already scoped out potential spots to take my bride and groom, so I have a game plan worked out in my head. The only thing that may have changed after pre-scouting is my lighting, so I need to be conscious of this. I have a mental checklist of shots that I will try to get of every bride and groom, especially if I’m pressed for time:
-Traditional “look at the camera and smile” shot
-Portrait of each individually
-Sitting shot
-Walking shot
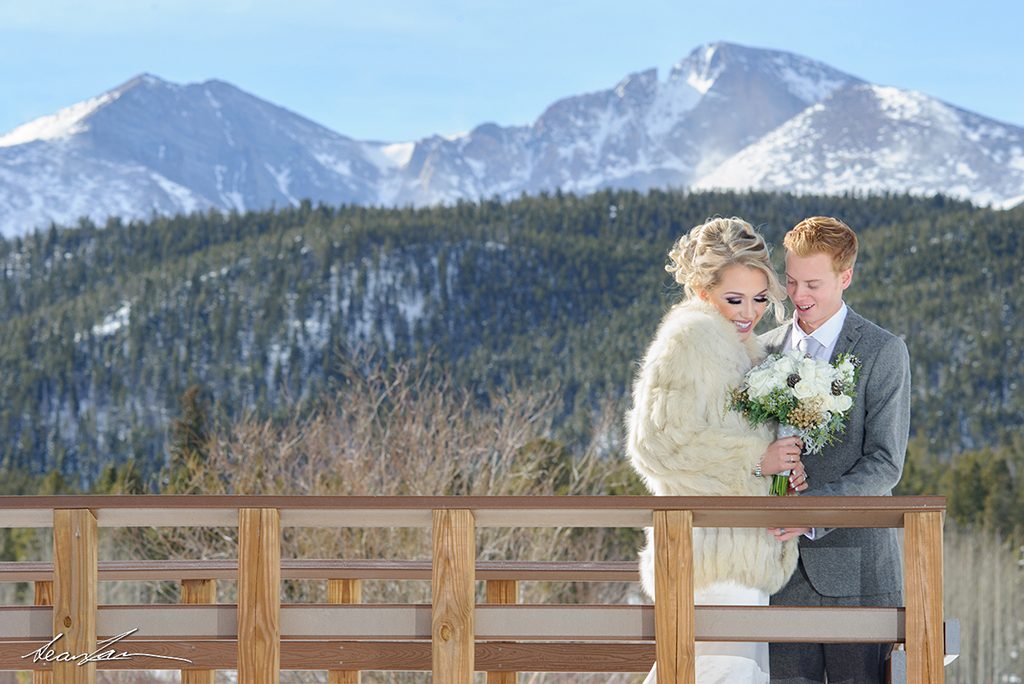
-Wide/scenery shot
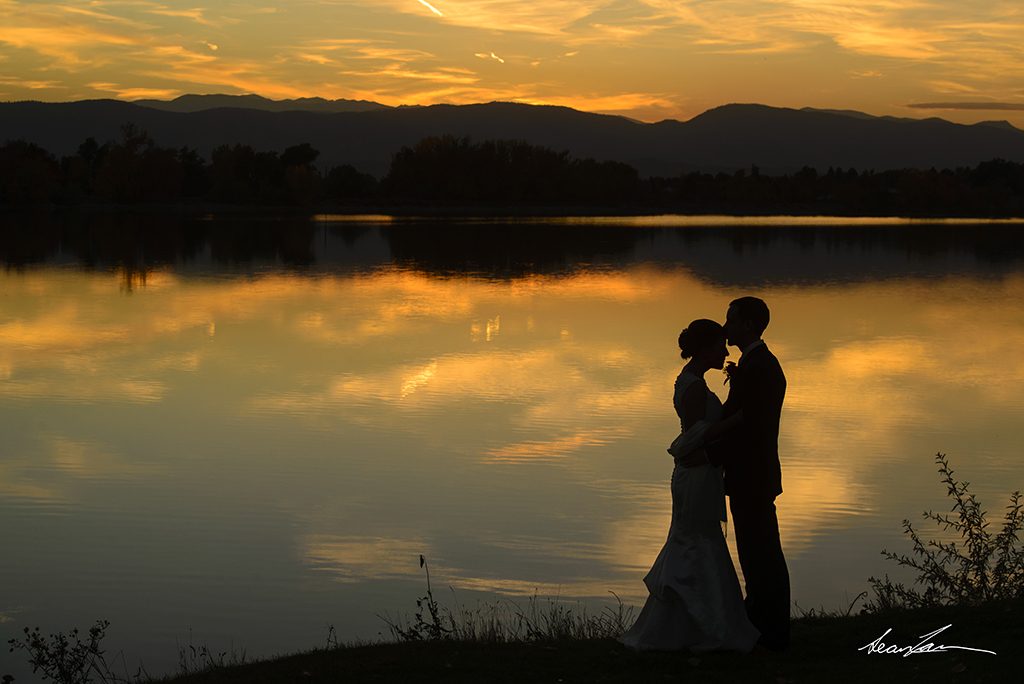
-Holding and facing each other. Tight and wide perspective
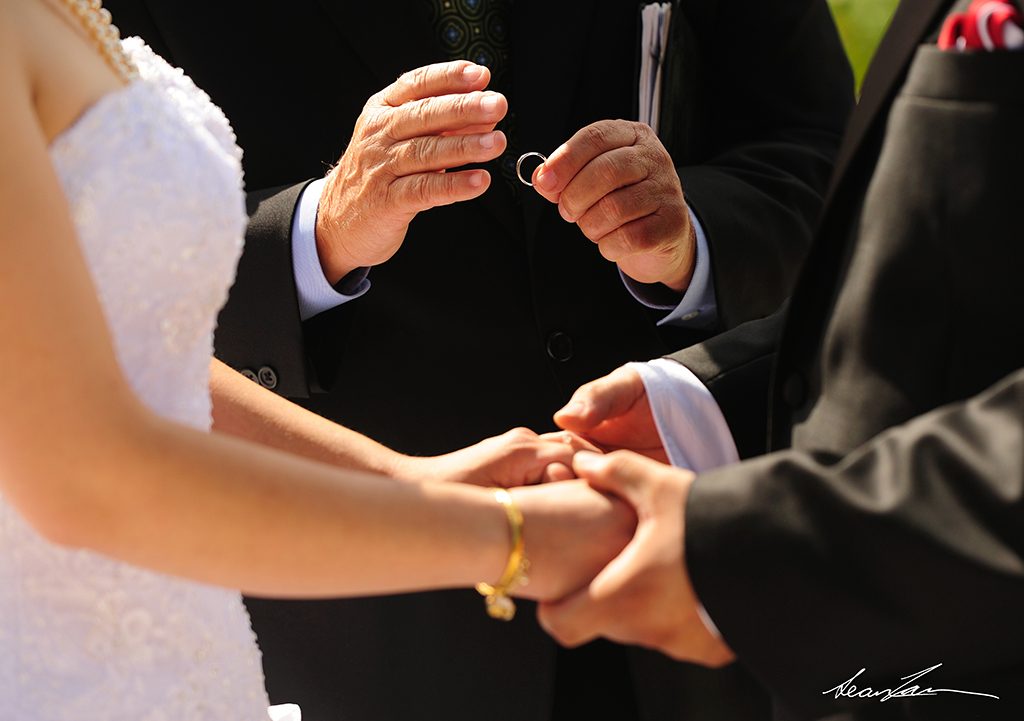
-Incorporate rings
For all of these shots, I will change posing slightly – some with kissing, others smiling, etc. It’s up to you to decide what’s most important.
One speedlight camera right. 135mm f2 DC
Ambient light. 70-200mm f2.8 VRII
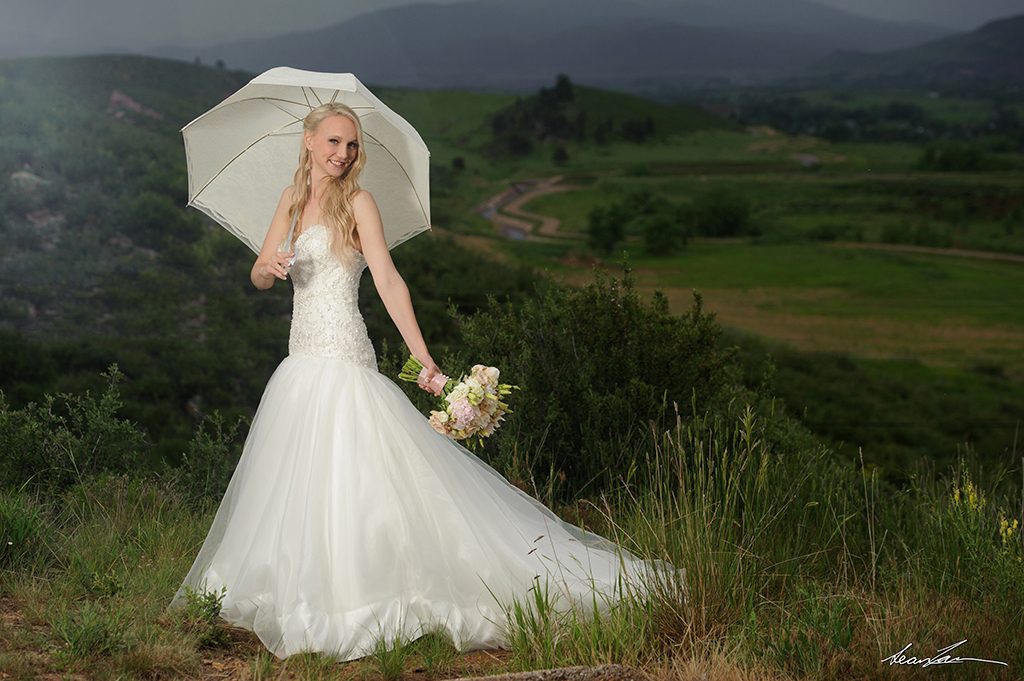
Under-exposing background with one speedlight on umbrella camera left. 85mm f1.8G
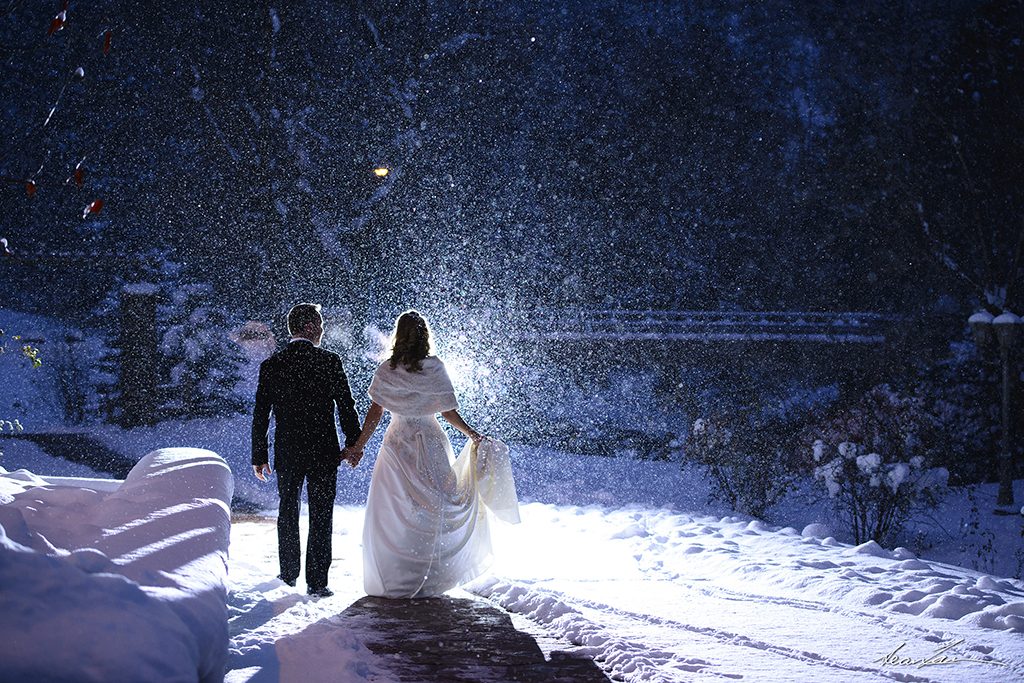
One speed-light behind subject (backlit). 70-200mm f2.8VRII
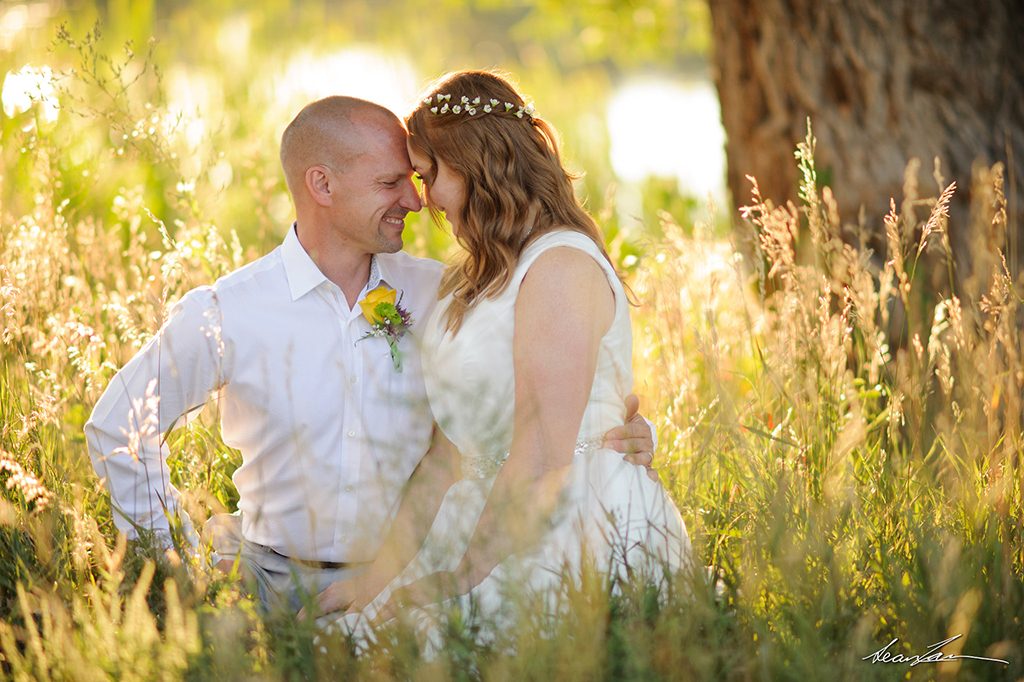
Ambient light. 135mm f2 DC
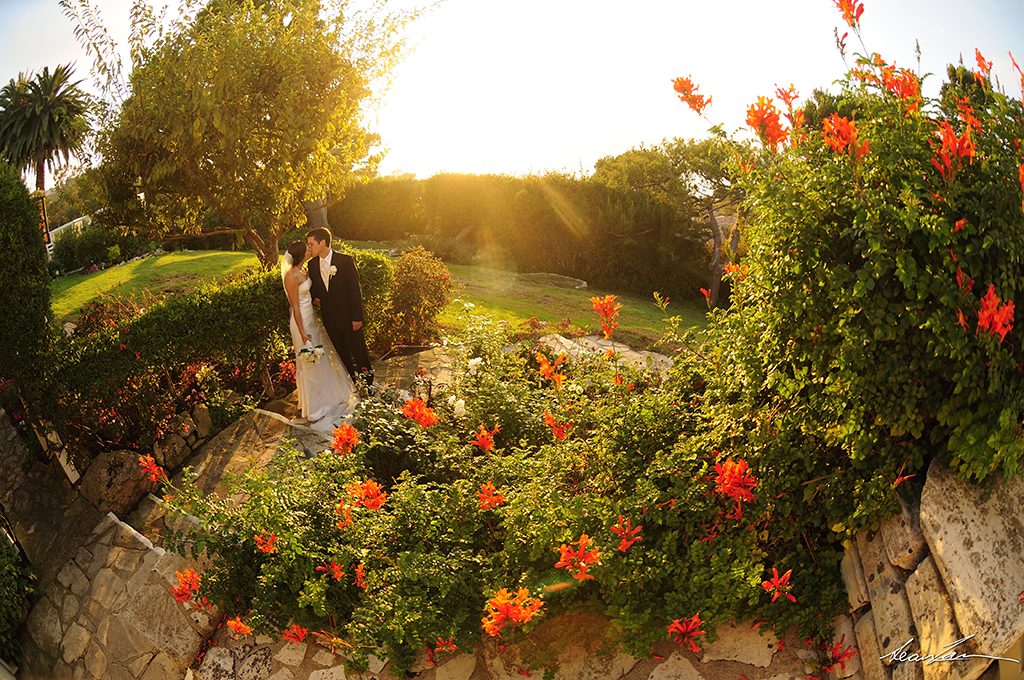
Ambient light. 10.5mm Fisheye.
Reception Coverage – Grand Entrance, Formal Dances and Toasts
Camera Selection: Full frame, Crop Frame for tight shots (situational)
Lens Selection: 70-200mm f2.8, 24-35mm f2, 20mm f1.8
Lighting: Off-camera flash. Ambient light if outside and daytime.
My Approach: At this point of the day, I go into photojournalism mode. From here on out, all of my shots are candid unless someone requests a portrait. More times than not, receptions are usually held in big halls with poor or low lighting, so it’s important to set up your light stands and speed lights properly. Many photographers are intimidated by using off-camera flash, but hopefully this guide will help alleviate some of that stress.
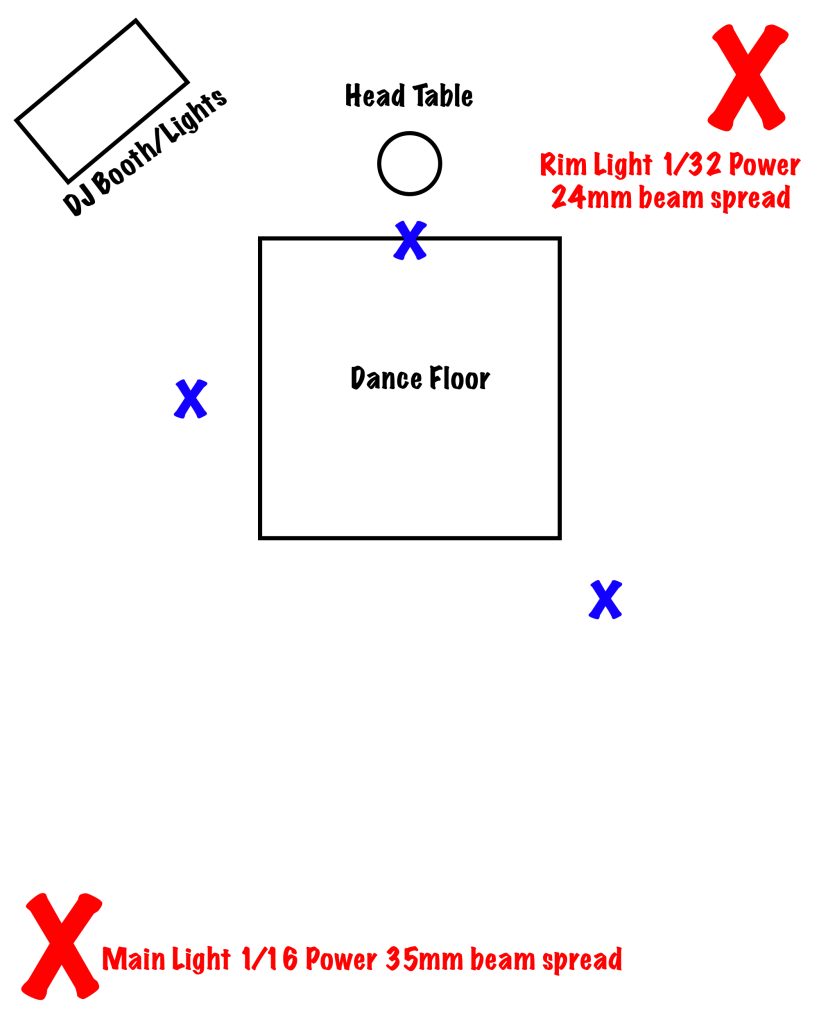
I always use two light stands with one light being my main light and the other being my rim. Depending on which way I’m facing, I can alternate between one being my main, and the other being my rim. Additionally, I’ll also have a flash on-camera in the event that I need additional fill light, or if I’m outside the range of where my lights can reach. The only time I’ve ever seen the need to use only one flash off-camera is when I’m photographing a reception in a small, white tent, and I can get even coverage of my flash on-camera as my main. The diagram below shows my general lighting setup in a traditional banquet/reception hall:
The red “X”s indicate where I place my speed lights on their light stands. I always place them in opposite corners of each other, that way I’ll not only have the greatest spread of coverage, but will be able to give my subjects dimension and make them pop from the background by having a light in the background creating a rim light. With this setup, I need to be conscious of where I’m standing to get the best light. If I stand directly next to one of my speedlights, I can get flat or harsh exposures, or if I stand directly across from one, I can get hazy images. The blue “X”s indicate where I’ll always try to position myself. Obviously you can’t always stand in these spots to get the shots you need, but these are my priority locations if I can make it happen. The power I set my speed lights to varies based off the ambient light, but most of the times I find myself shooting at 1/16th power or 1/32nd.
For the formal dances, I will shoot telephoto not only to get tight perspectives, but allow the couple some privacy. There’s nothing that annoys me more when a photographer is in their face when everyone is trying to watch, and they’re having a special moment. Additionally, I’ll capture wide perspectives to capture the ambience of the room. Toasts are always shot telephoto as well. If I have a second shooter, I will have them focus on capturing guest reaction shots.
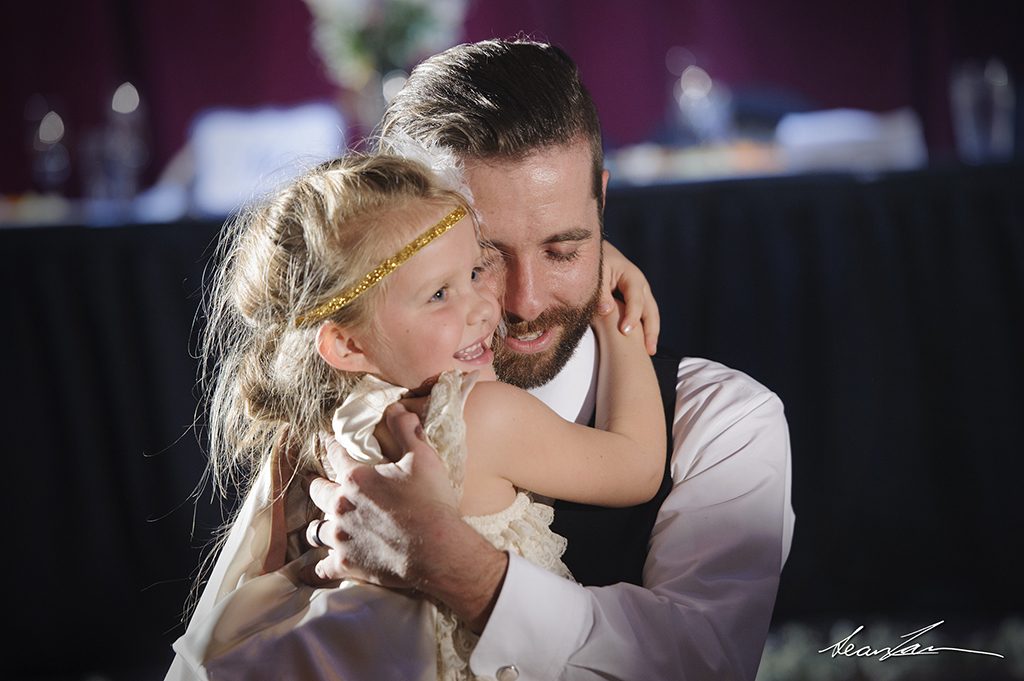
Two light setup. Main light camera right, rim light camera left. 70-200mm f2.8 VRII. 1/160s, f3.5, ISO 2000
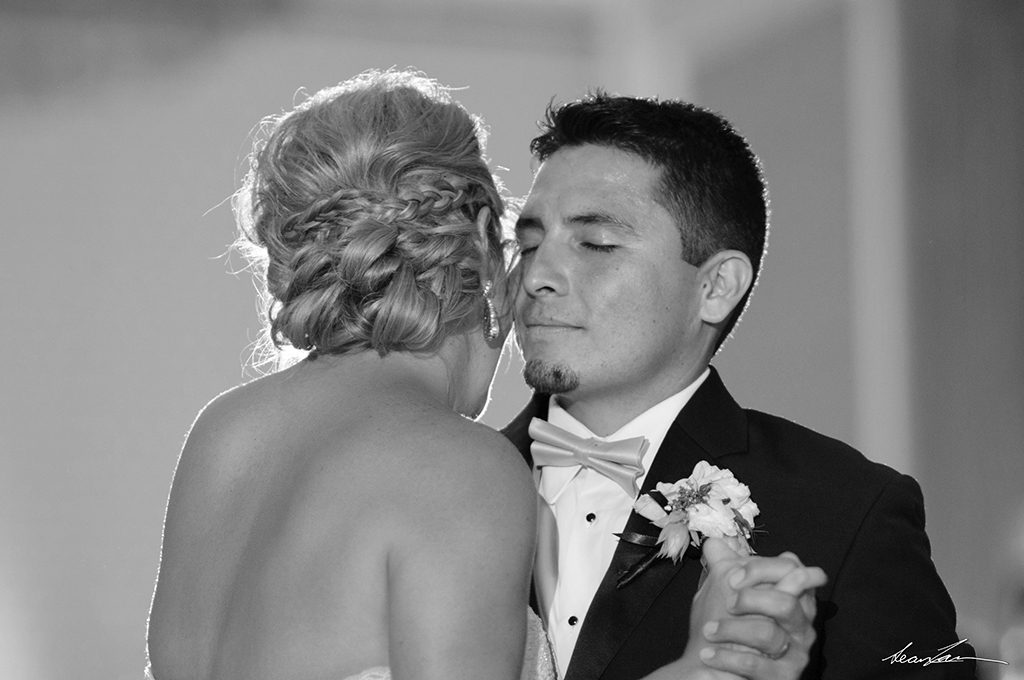
Two lights off camera. 135mm f2 DC on D300 crop body.

Moderately challenging lighting situation. Group was pushed up against that wall creating shadows. Two light setup, camera left and right. 70-200mm f2.8 VRII
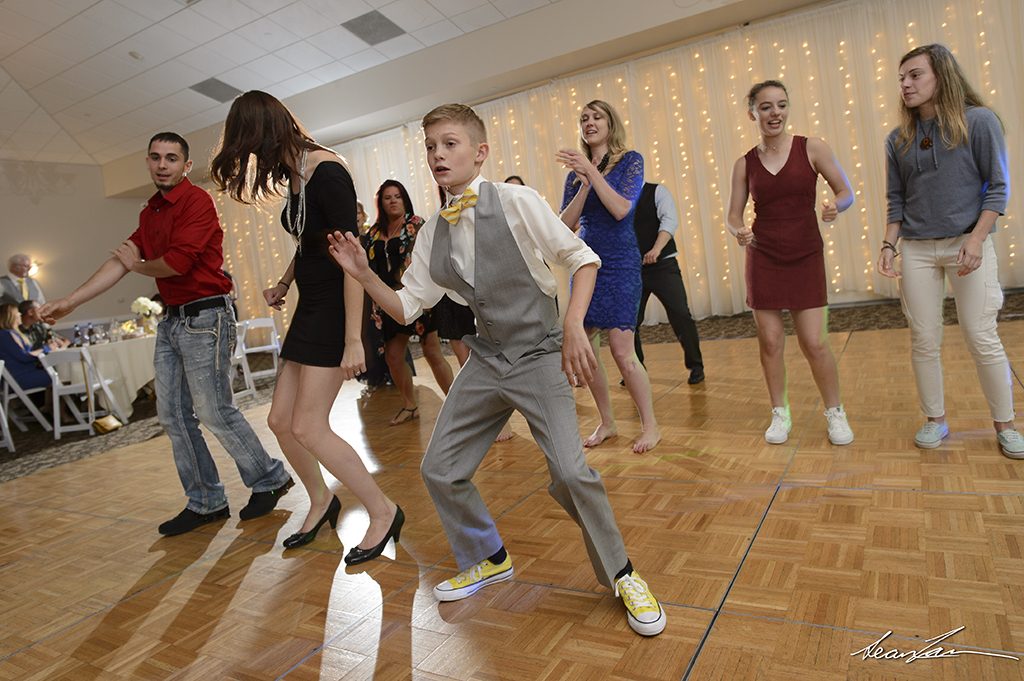
Reception Coverage – Dancing, Cake Cut, and Bouquet/Garter Toss
Camera Selection: Full Frame
Lens Selection: 105mm f1.4, 50mm f1.4, 20mm f1.8
My Approach: When it comes time to capture “drunk dancing”, I switch to a 20mm to capture wide, “in your face” perspectives. I like to get up close and personal with people dancing, and make the viewer feel like they were actually there on the dance floor. My lighting setup stays the same, but I will typically change my lens selection. The 20mm I use has a 1.8 aperture which is very handy in low lit reception halls, and is a very sharp lens. While I can’t use a 20mm for every shot, I also have a 105mm f1.4 on my other hip in case I need to capture something that requires a little more range. It’s also great for capturing emotion and candid moments. If the room is small or there are a ton of people, I’ll substitute the 105mm for an 85 or 50mm. Conveniently, these lens combos also happen to be the some of the lightest pieces of equipment I own, so after a long day of walking around, moving equipment and carrying gear on my shoulders, it’s nice to give my back a break.
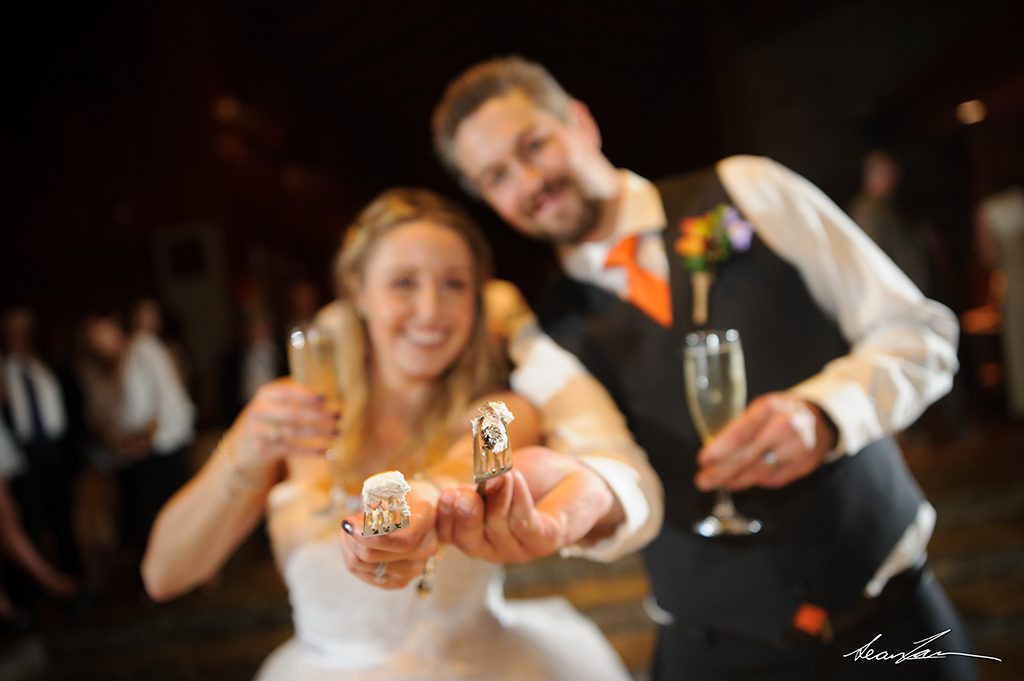
One light on light stand camera right, fill light from bounce card on camera. 24-35mm f2 A. 1/60s, f2.8, ISO 2000

Two light setup – camera left (backlit) and camera right. 50mm f1.4. 1/60s, f1.8, ISO 2500
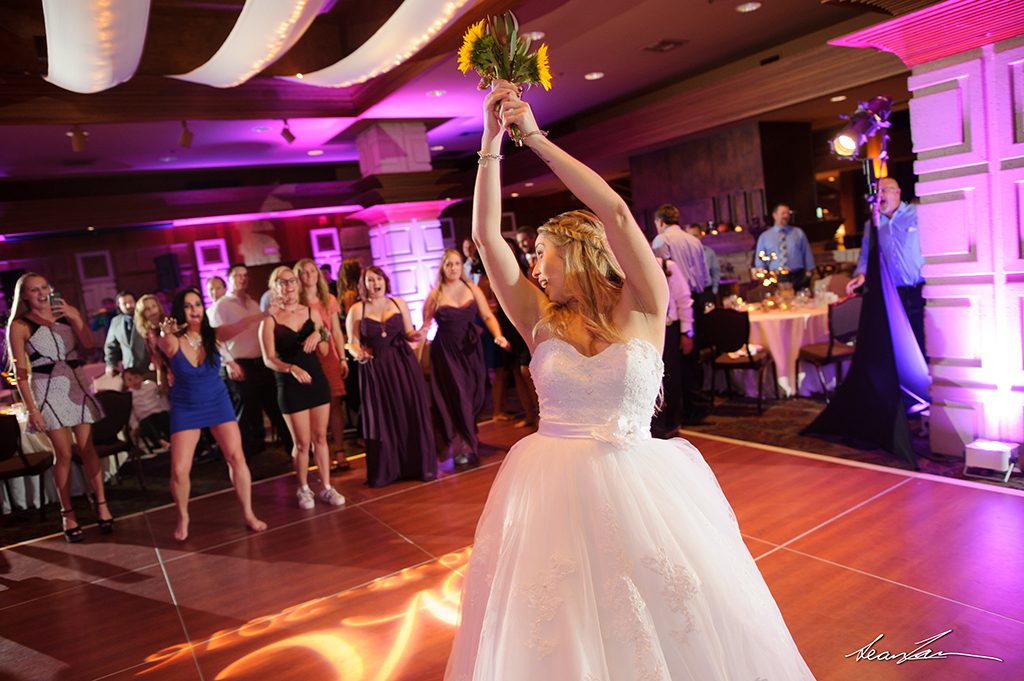
Two light setup. Flash on camera for fill. 20mm f1.8G. 1/30s, f2.8, ISO 2500
Two light setup, one flash bounced off ceiling for fill. 20mm f1.8G.
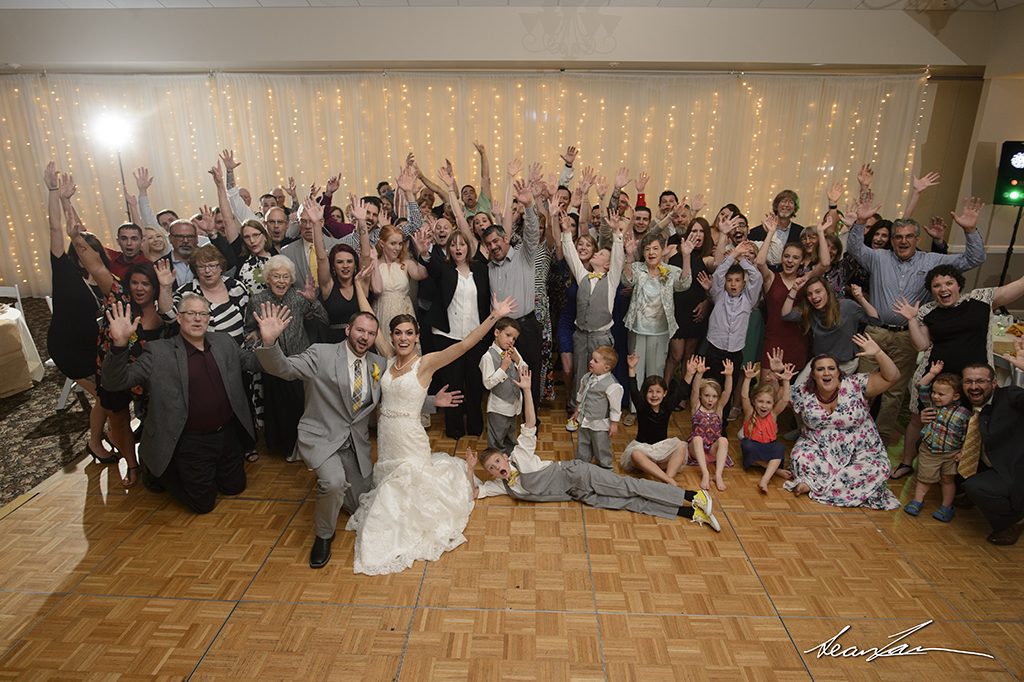
Quick group portrait. Two light setup, one flash bounced off ceiling for fill. 20mm f1.8G.
Post Processing
Everyone has their own method for the post production of photos, but for me I do almost all of my editing in Lightroom. Some weeks i’ll find myself photographing 4 weddings, so I try to limit the amount of time I sit behind a computer. I almost never touch photoshop anymore unless major editing is required.